Customise the connection points on a shape
When you hover over a shape that isn’t selected, the connection points (or anchor points) are shown as small crosses.
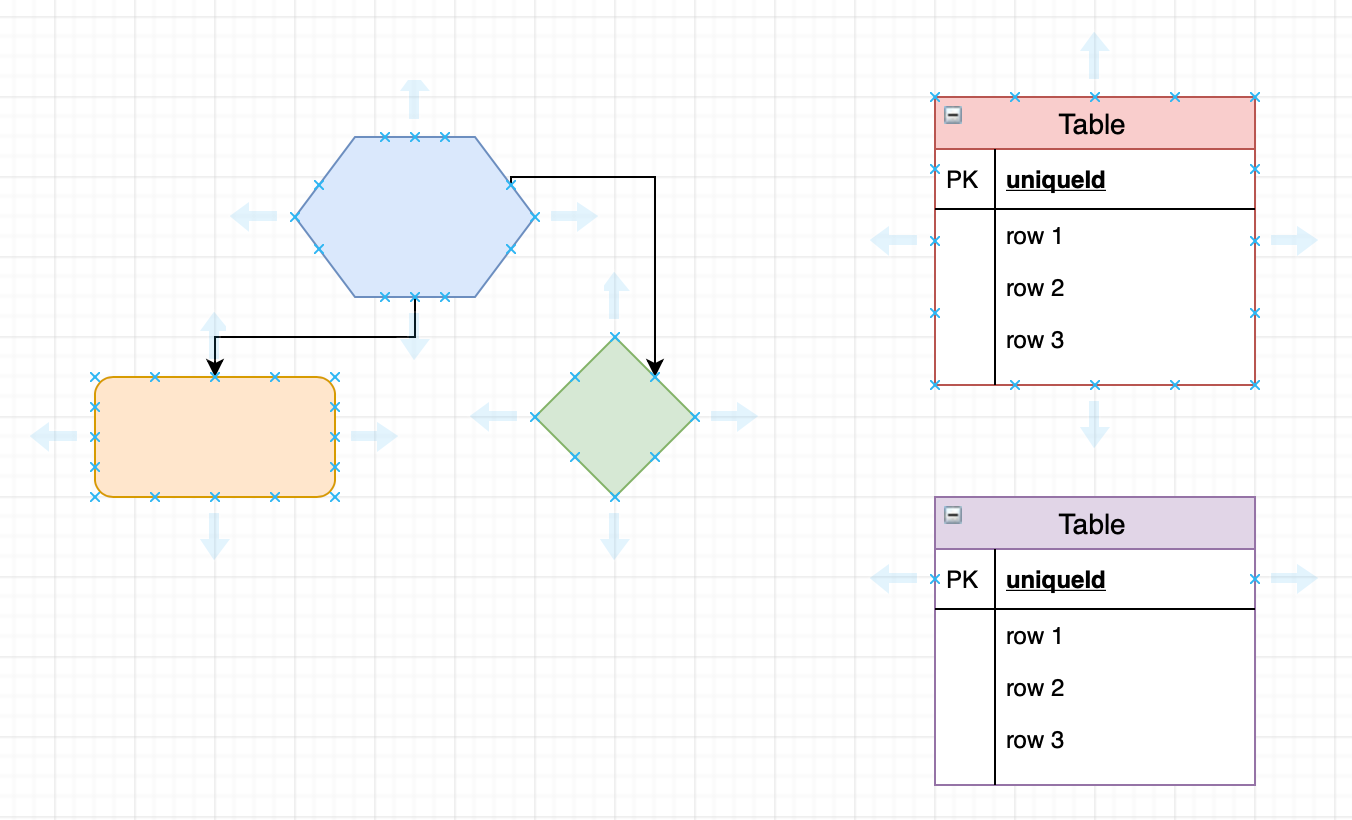
You can use the connection points on a shape to connect a fixed connector. When you move the shape around, the connector stays attached to exactly that connection point, it doesn’t float around the perimeter of the shape.
Connection points are also used when you enable the snap to point shape property - instead of a connector floating smoothly around the perimeter when you move it or the shape, it will snap to the defined connection points.
Learn more about connecting shapes
Force a fixed or floating connection
You can force a floating or fixed connection at any location by using a keyboard shortcut, even if the shape has custom connection points or the snap to point shape property enabled.
- Hold down
Shiftas you drop the connector on a shape to connect it to the shape’s outline. - Hold down
Altas you drop the connector on a shape to add a fixed connection inside the shape.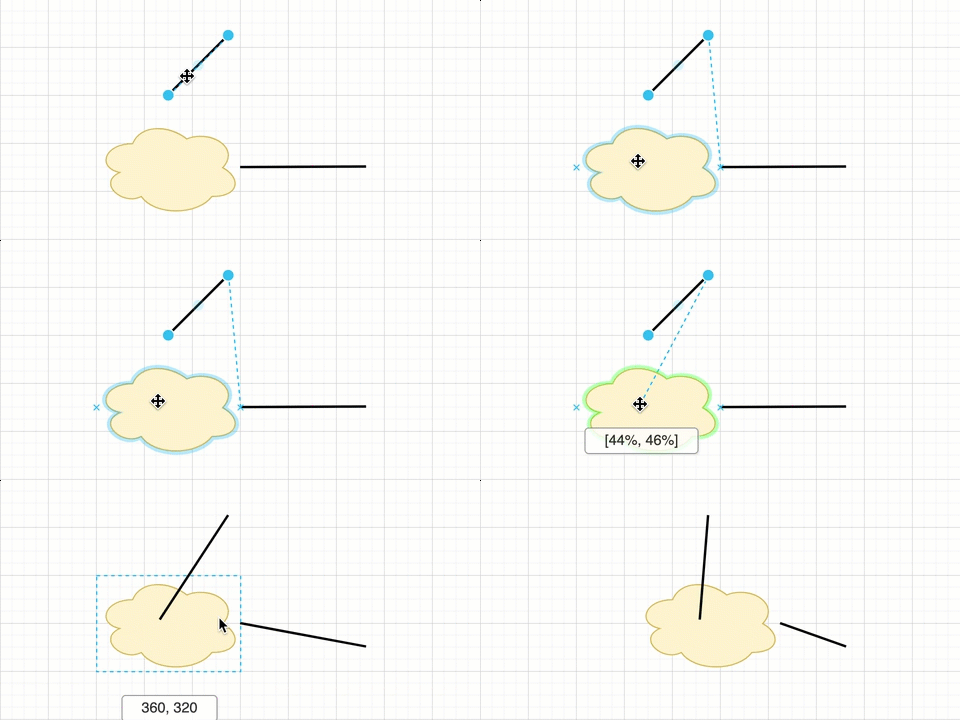
Edit a shape’s connection points
A visual editor makes it easy to change the fixed connection points on a shape.
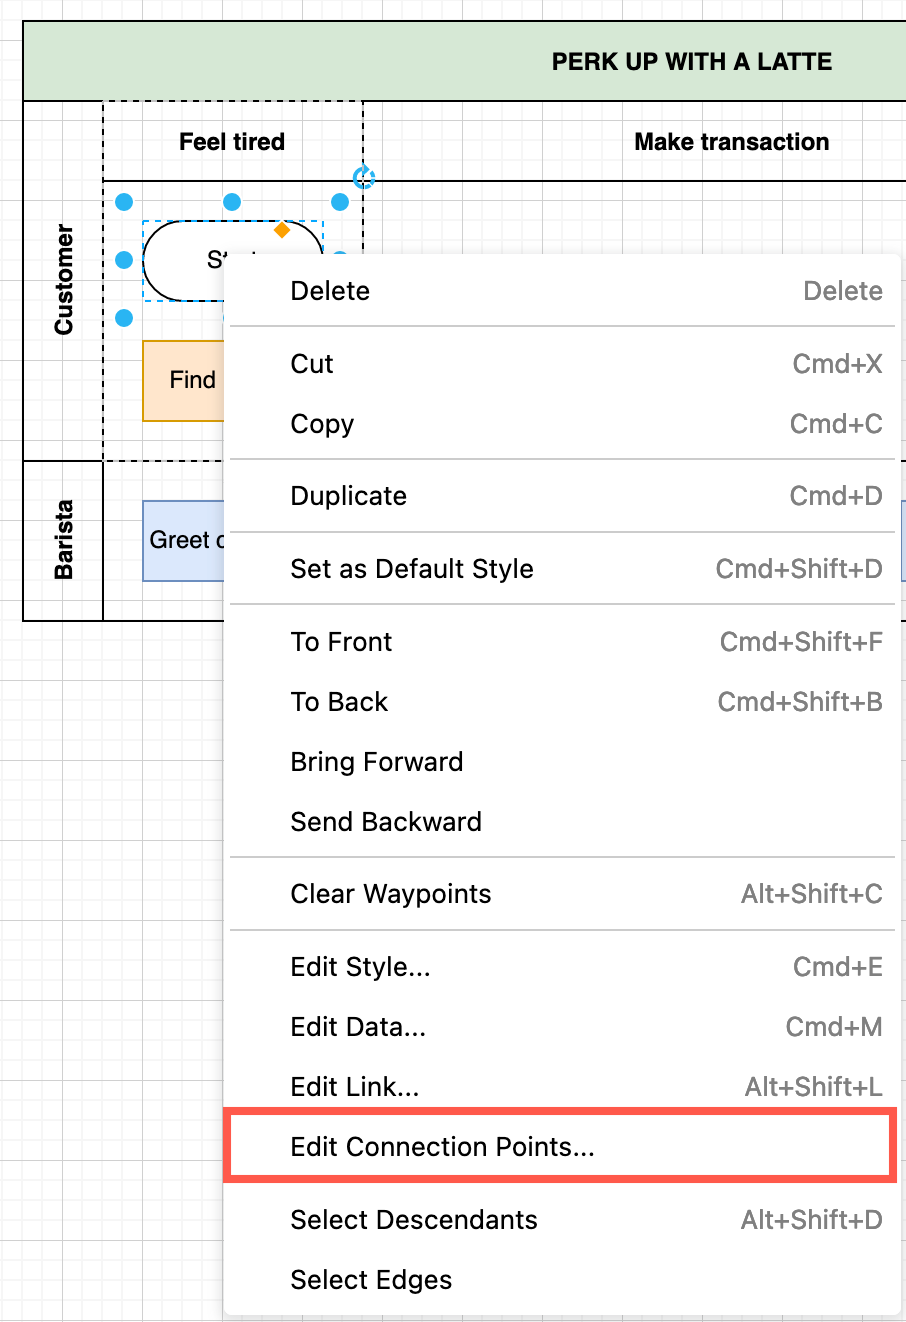
Right click on a shape and select Edit Connection Points.
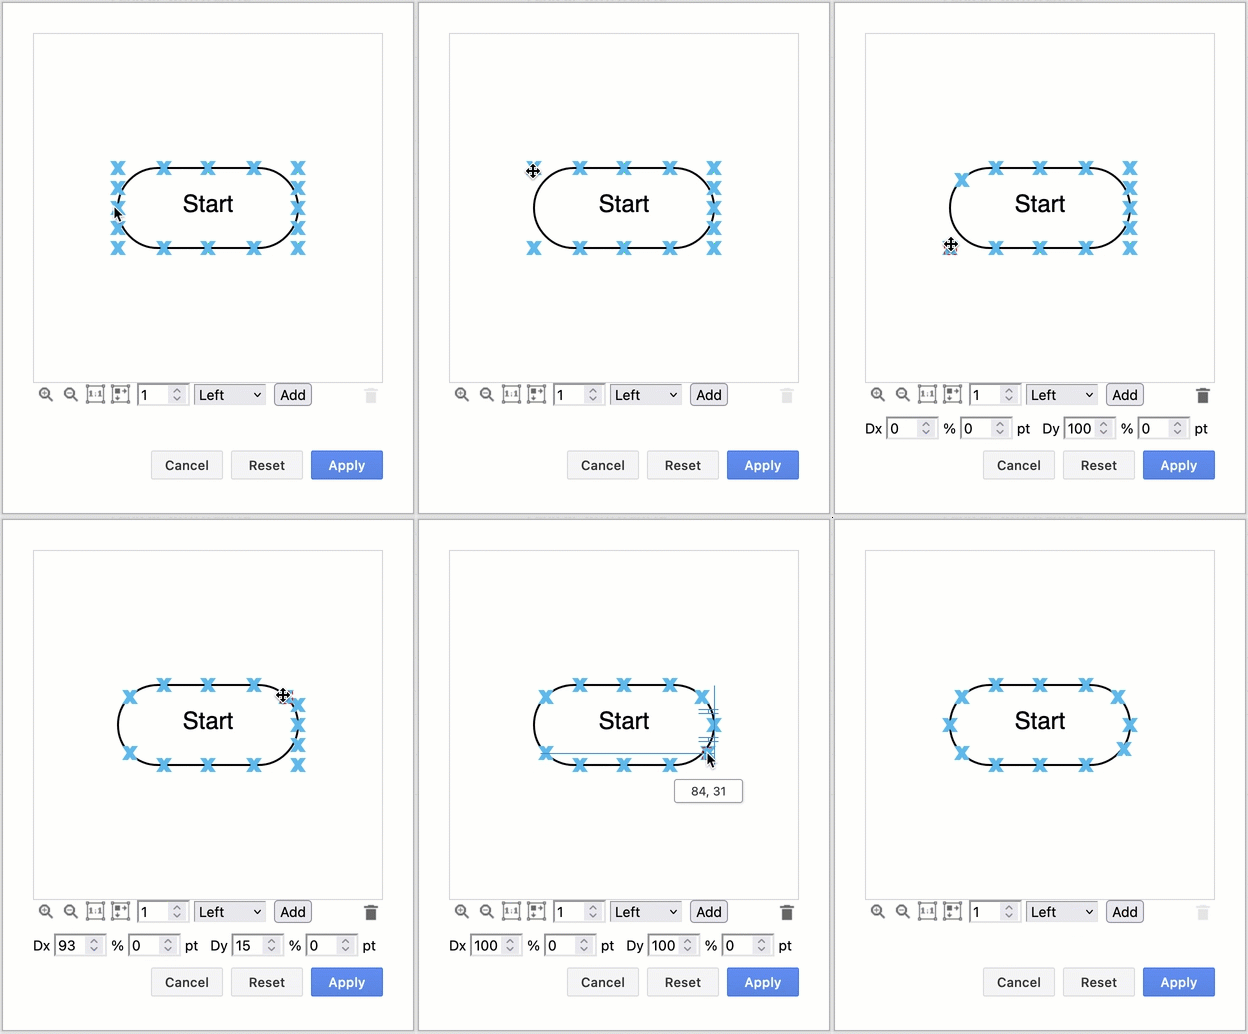
Select a connection point: Click on a connection point, or select multiple connection points by dragging a selection box around them.
Delete connection points: Select one or more connection points, then press Delete or click on the Delete icon just under the editor on the right.
Add new connection points: Double click anywhere on or around the shape or click Add.
Move connection points: Drag the selected connection point(s) to a new position or shift selected connection points to the left/right or up/down by entering a positive or negative value in Dx or Dy.
Define connection points in the shape style
You can define your own custom shape style and specify exactly where the connection points should be located around the shape perimeter. The custom coordinates you specify in the shape style override the default connection points.
Add new points in x,y pairs, with values between 0 and 1, which correspond to positions on the shape’s outline, relative to the outer four ‘corners’ of the shape. Top left is [0,0], top right is [1,0], bottom left is [0,1], bottom right is [1,1].
For example, you can redefine a cloud shape to have just two connection points (on the left), instead of the default connection points (on the right).
![Define your own connection points by adding the points[] array to a shape's style](/assets/img/blog/override-connection-points.png)
- Select the shape, then click Edit Style in the Style tab of the format panel. Alternatively, press
Ctrl+E(on Windows) orCmd+Eon macOS. - Enter the new connection points in the form of an array of x,y coordinates to the shape style definition. For example, to add only two points, one to the left and one to the right:
points=[[0,0.5],[1,0.5]];![Define your own custom connection points by adding locations in the points[] array in the shape's style](/assets/img/blog/edit-style-override-connection-points.png)
- Click Apply.
In the example below, the snap to point shape property has been enabled to show how the connector moves to another custom connection point as you move the shape around.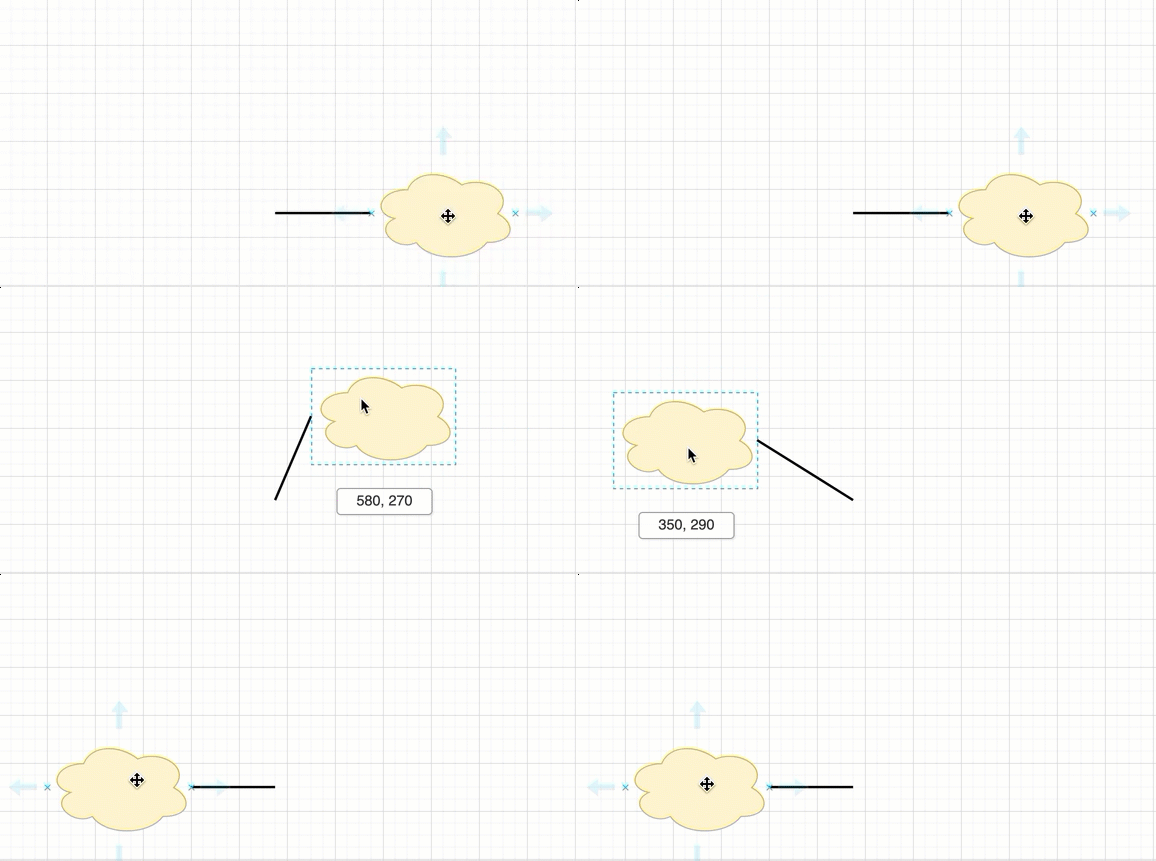
Clear custom connection points: If you no longer want a shape to have custom connection points, you can delete the points[] array from the shape style to reset the connection points of a shape back to their defaults.
Build your own custom shapes
You can create your own custom shapes in addition to simply modifying an existing shape’s connection points by specifying the custom shape’s foreground and background geometry, connection points, shape styles and label text.
Note: An optional third coordinate in the points[] array may function as a toggle (outline/perimeter), or an offset to move the connection point around inside the shape or between its outline and its perimeter, but this works only on some shapes. This third coordinate is therefore only used for development purposes. An optional fourth and fifth coordinate may be added to define an absolute offset in pixels.
points=[[x0,y0,p0,dx0,dy0],[x1,y1,p1,dx1,dy1],...,[xn,yn,pn,dxn,dyn]]