How to use sketch.diagrams.net as an online whiteboard
This diagrams.net Sketch editor theme has an endless whiteboard-style canvas and is ideal to use as a collaborative online whiteboard with your remote team. The lack of page and grid lines, along with the simple toolbar, minimised panels and the default hand-drawn rough style for shape outlines, shading, connectors, and text labels feels like an informal physical whiteboard, much less intimidating than traditional diagramming apps.
Note that the Sketch editor theme is also available in our draw.io branded integration to Confluence Cloud. It is also coming to draw.io for Confluence Data Center.
The Sketch editor theme is under active development. Please add any suggestions or ask questions in this discussion thread on the GitHub draw.io project.
Tip: To use the Sketch editor theme in our draw.io branded app in Atlassian Confluence, add the draw.io Board macro to a page. Our secure draw.io integration for Confluence is built, delivered and maintained by JGraph alongside the online diagrams.net and desktop tools.
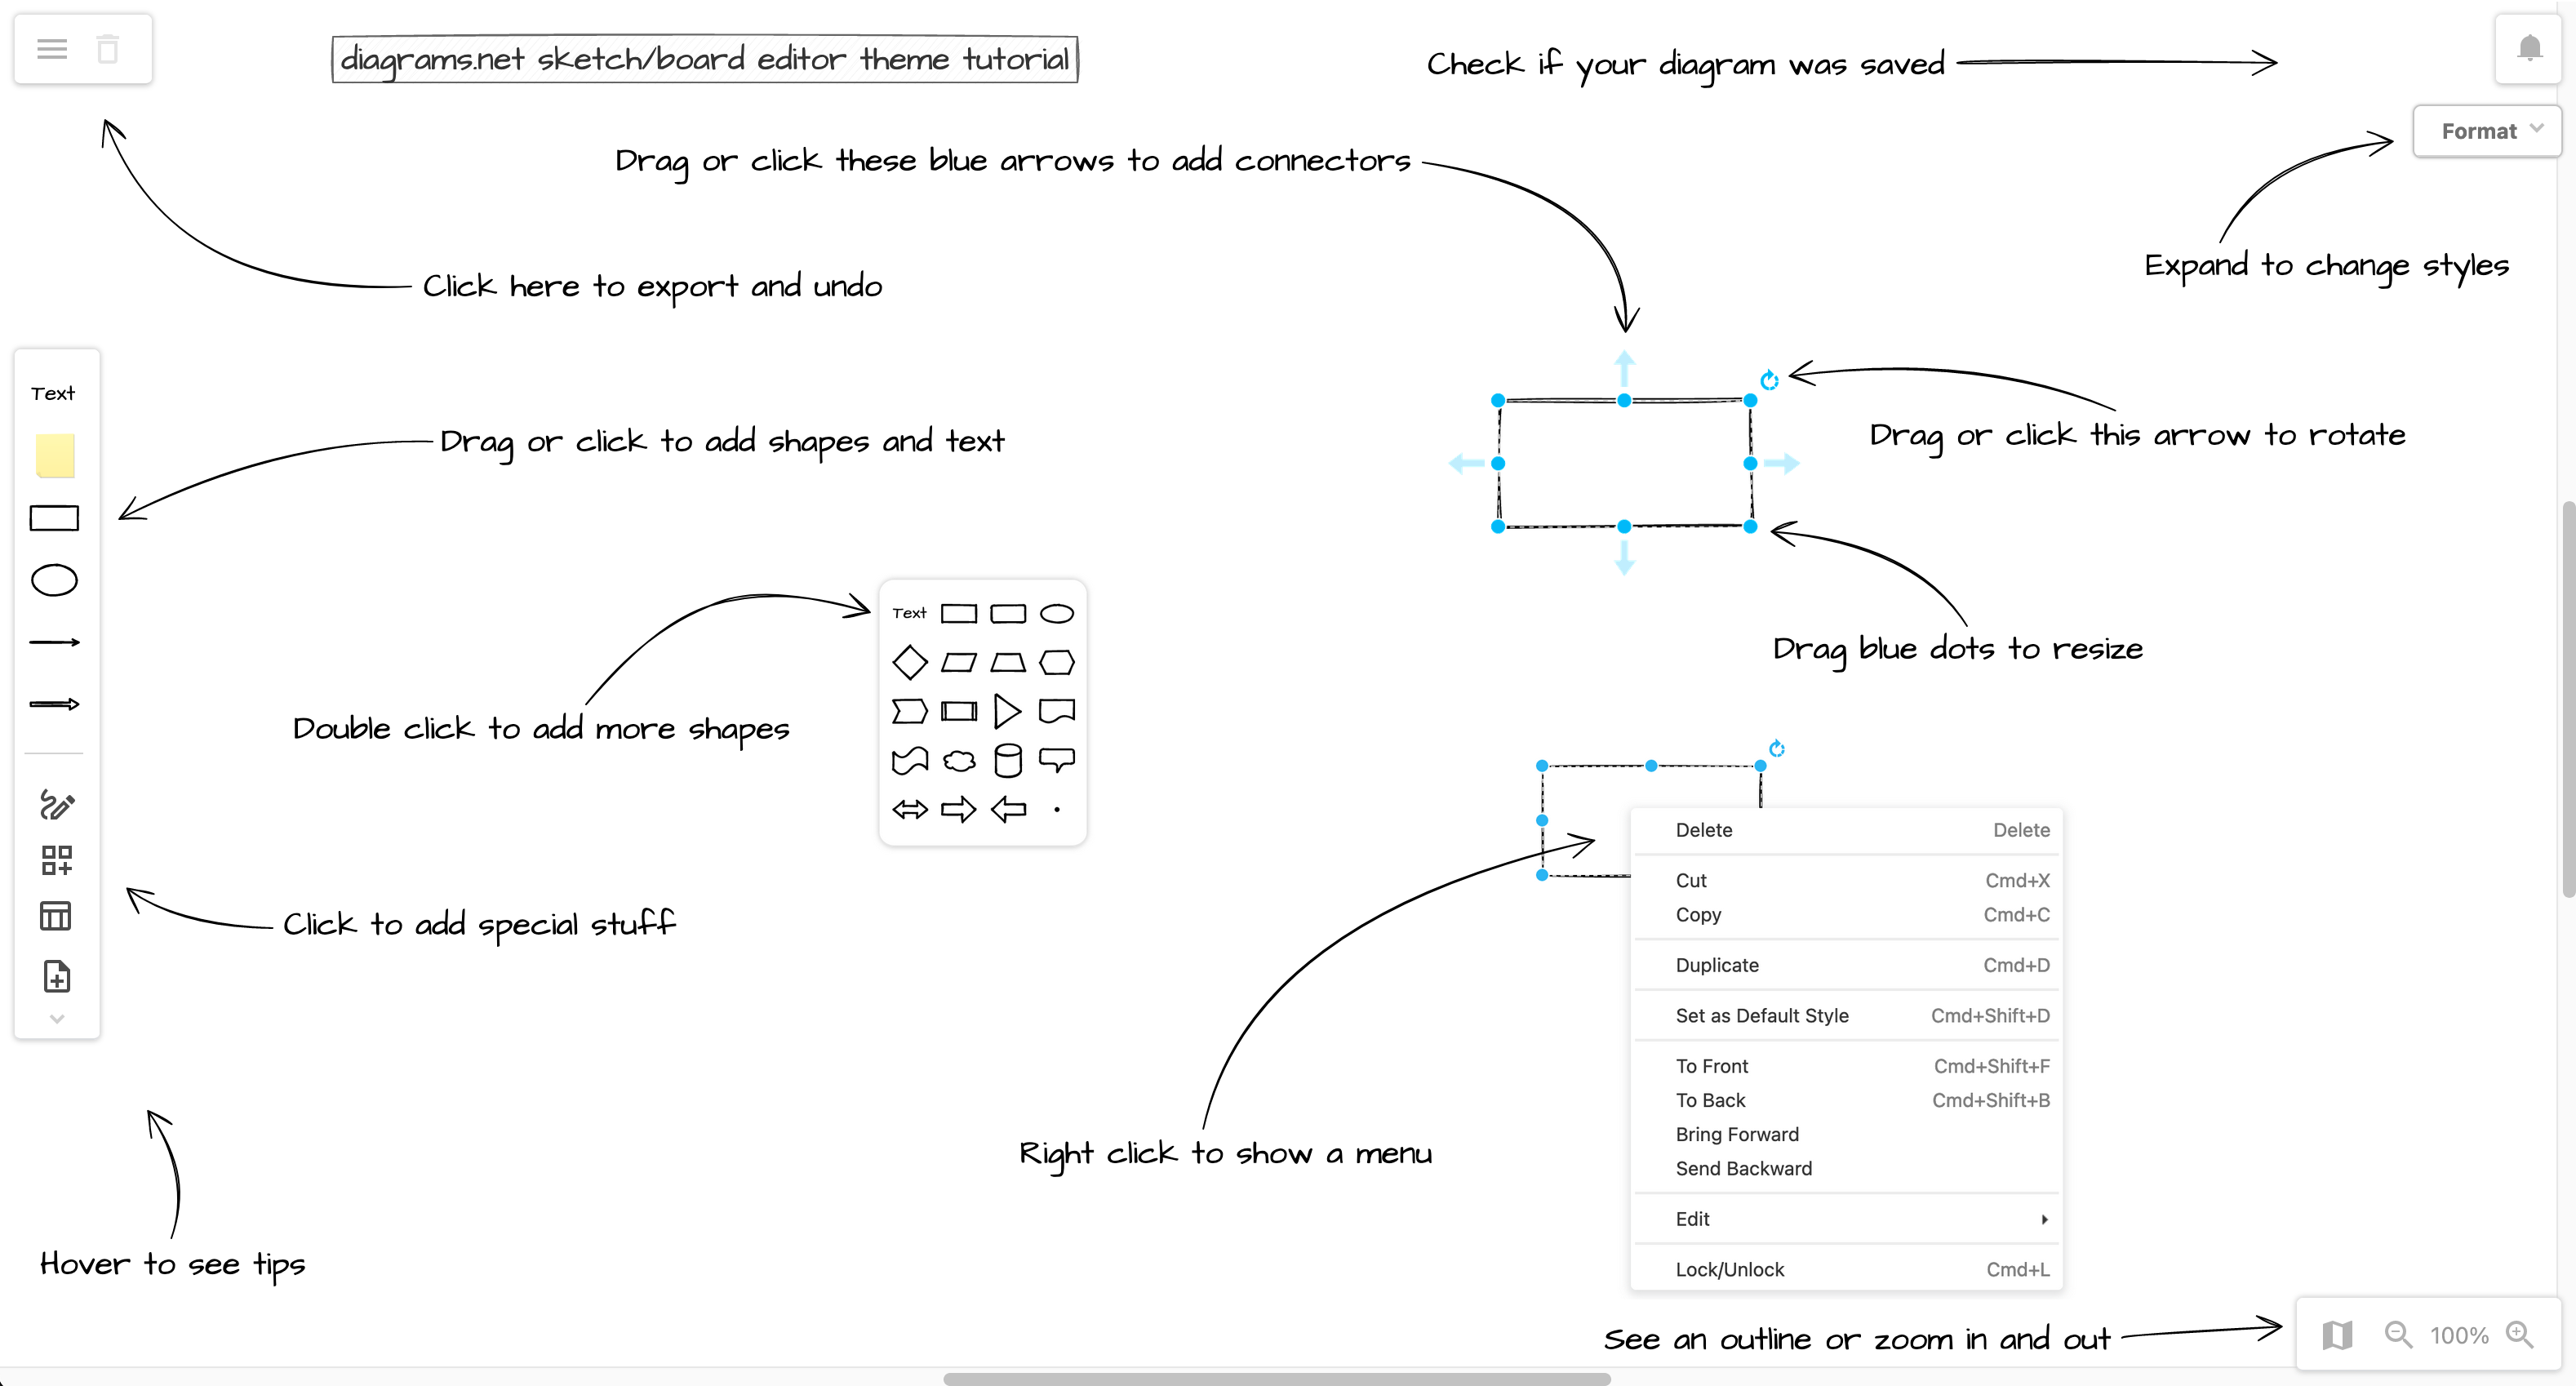
Open this tutorial diagram in the Sketch whiteboard editor theme at diagrams.net
This editor theme is also used in our draw.io for Notion Chrome extension that allows you to embed, edit and store single-page diagrams in Notion.
Use the diagrams.net online whiteboard
- Open the diagram above in diagrams.net using the Sketch editor theme.
- Alternatively, if you have sketch.diagrams.net already open, drag the
.pngimage from this page into that browser tab - the image contains all of the diagram information with individual shapes.
- Alternatively, if you have sketch.diagrams.net already open, drag the
- If prompted, choose where you want to save the file.
- Resize your browser to line the tutorial up with the interface elements.
Your whiteboard diagram will be automatically saved - you will see notifications in the top right near the bell icon when the file is successfully saved.
Use the floating panels: The additional floating panels with the shape library, format options, layers, and more, are either minimised or hidden by default.
- Click on the arrow next to the title to expand or minimise the floating panel.
- Click on the Shape tool in the toolbar on the left to see the shape libraries.
- Drag any floating panel to another position in your browser window.
See tooltips: Hover over any part of the diagrams.net app to see a tooltip.
Add and select shapes
Add a shape from the toolbar: Drag or click on a shape, a sticky note or the Text tool in the toolbar on the left to add them to the whiteboard. Start typing to add a text label.
Add a shape from the selection dialog: Double-click anywhere on the blank whiteboard area to open a selection box with more shapes. Click on one of the shapes to add it.
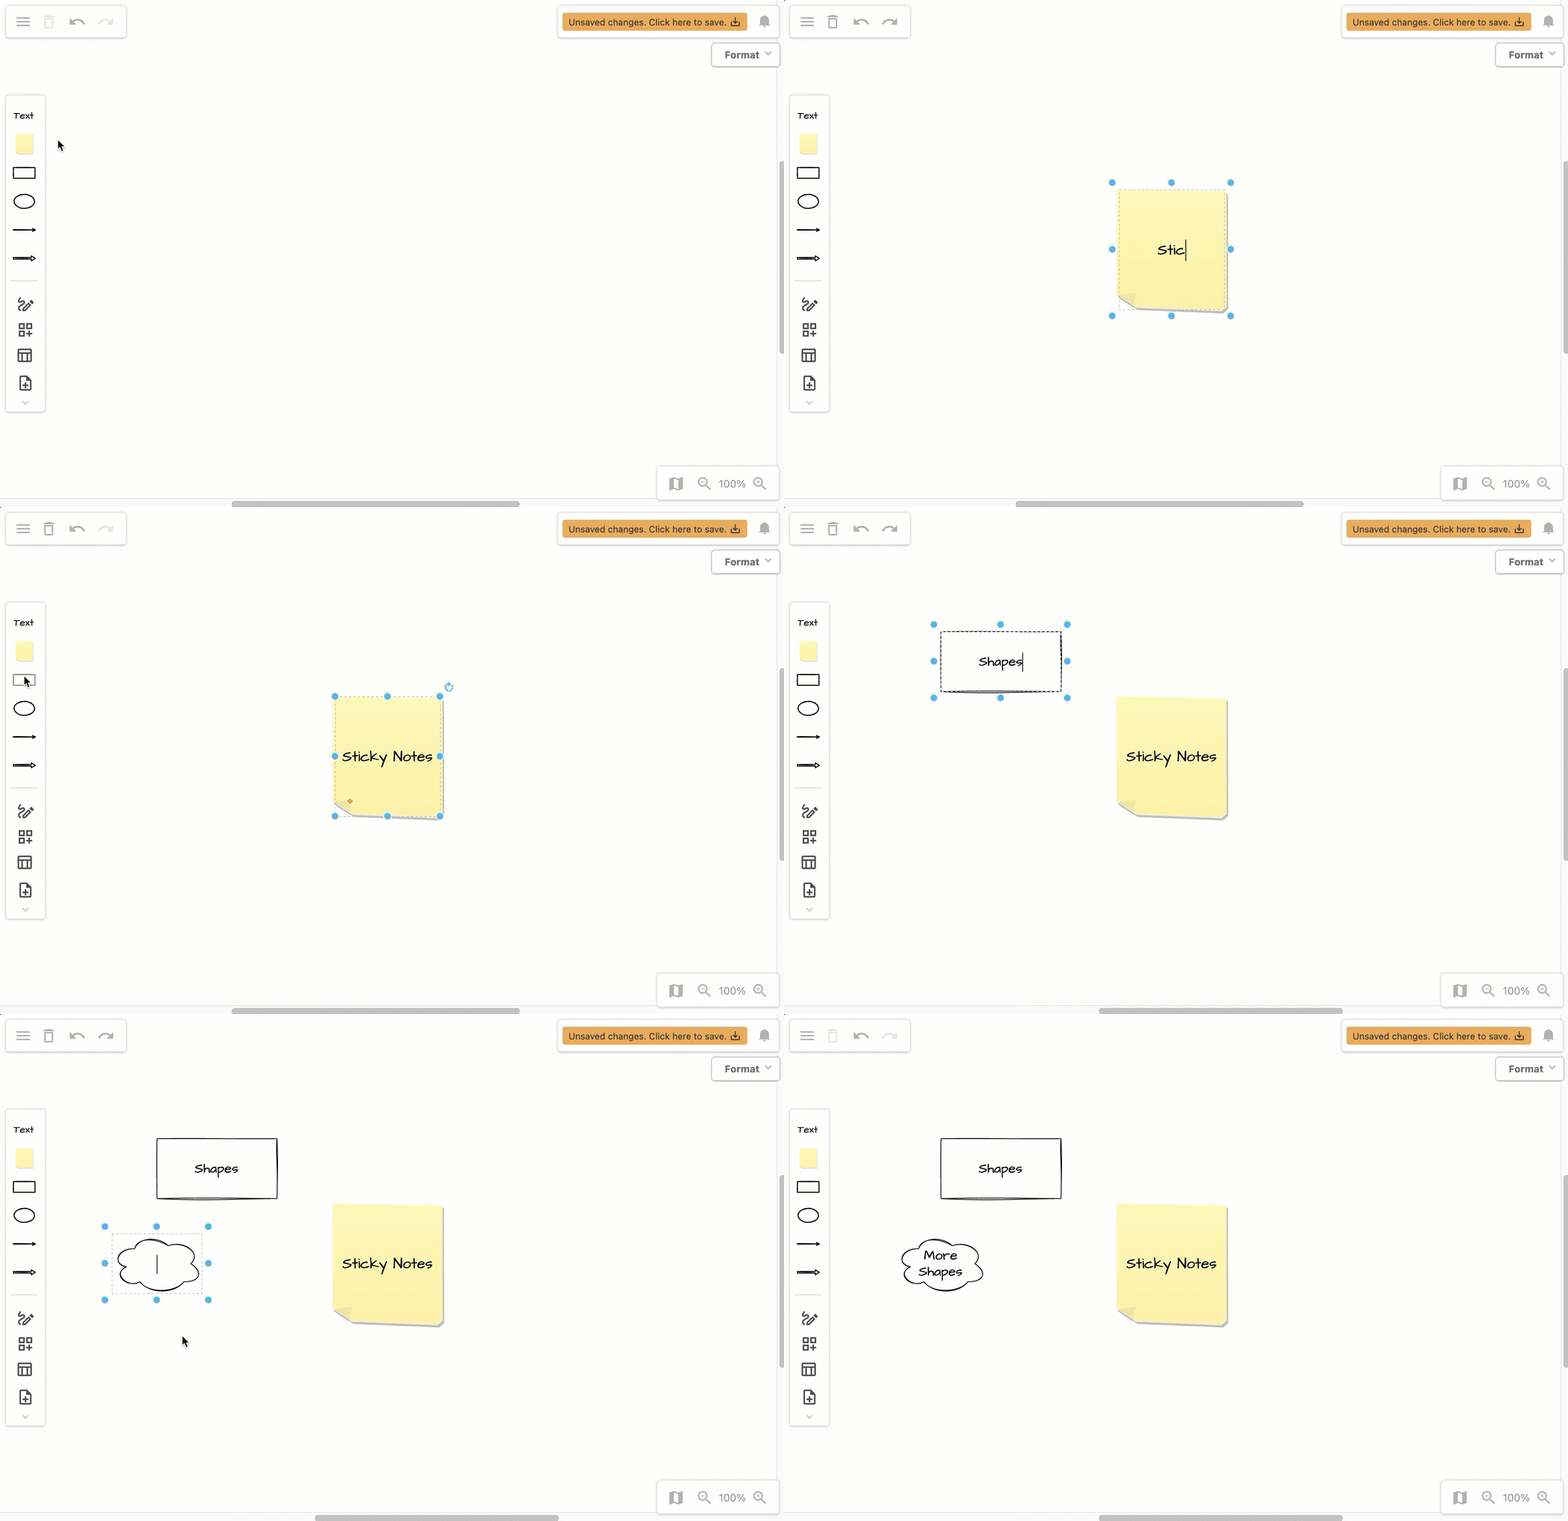
Select a shape: Click on a shape, sticky note or text box on the whiteboard canvas to select it. After selecting it, type a text label or style it with the format panel (introduced later in this tutorial).
Select a group of shapes: Drag or click on the arrow in the top right of the selected shape to rotate it around a central point.
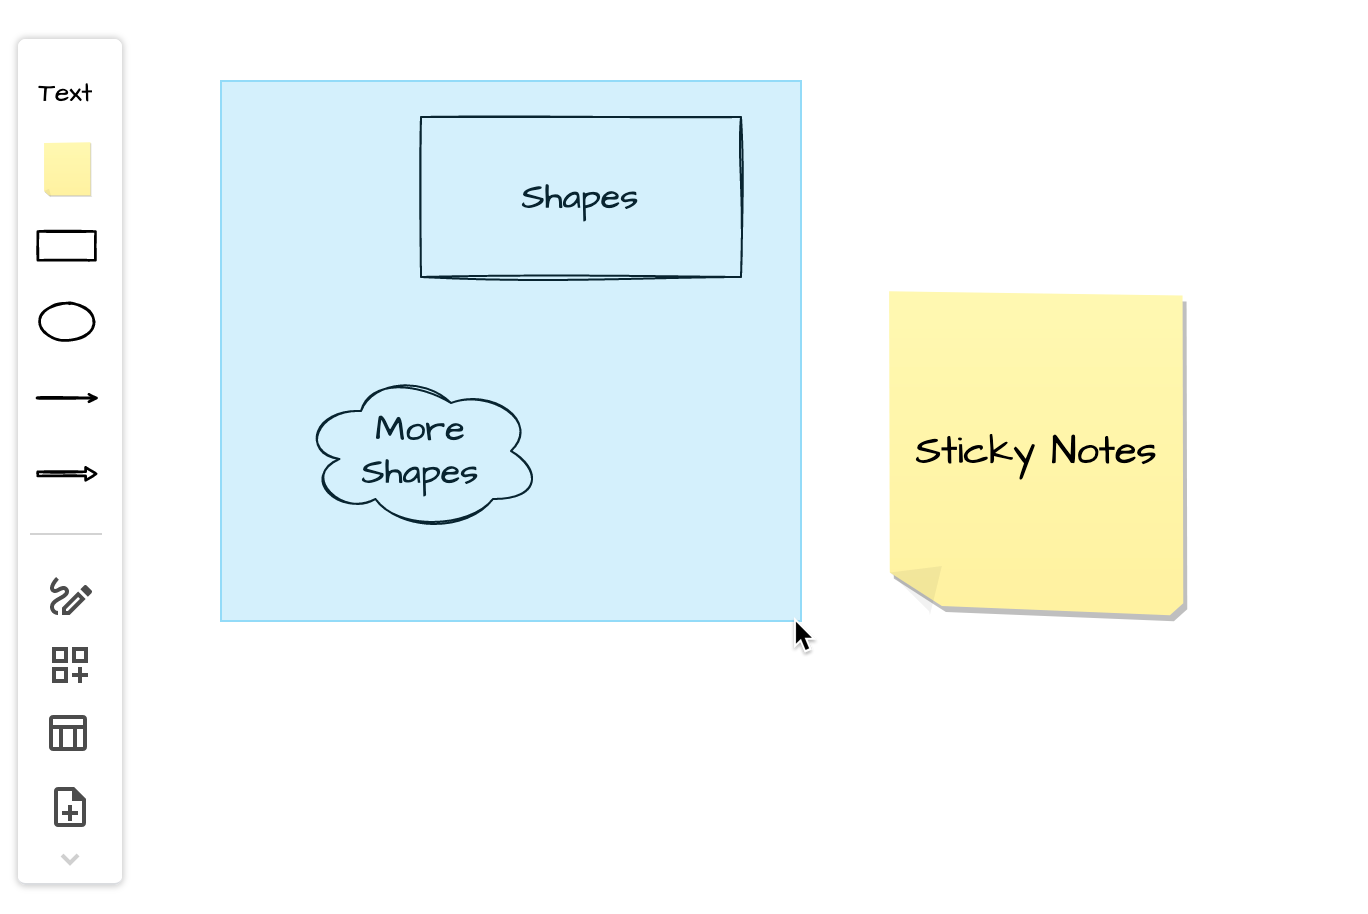
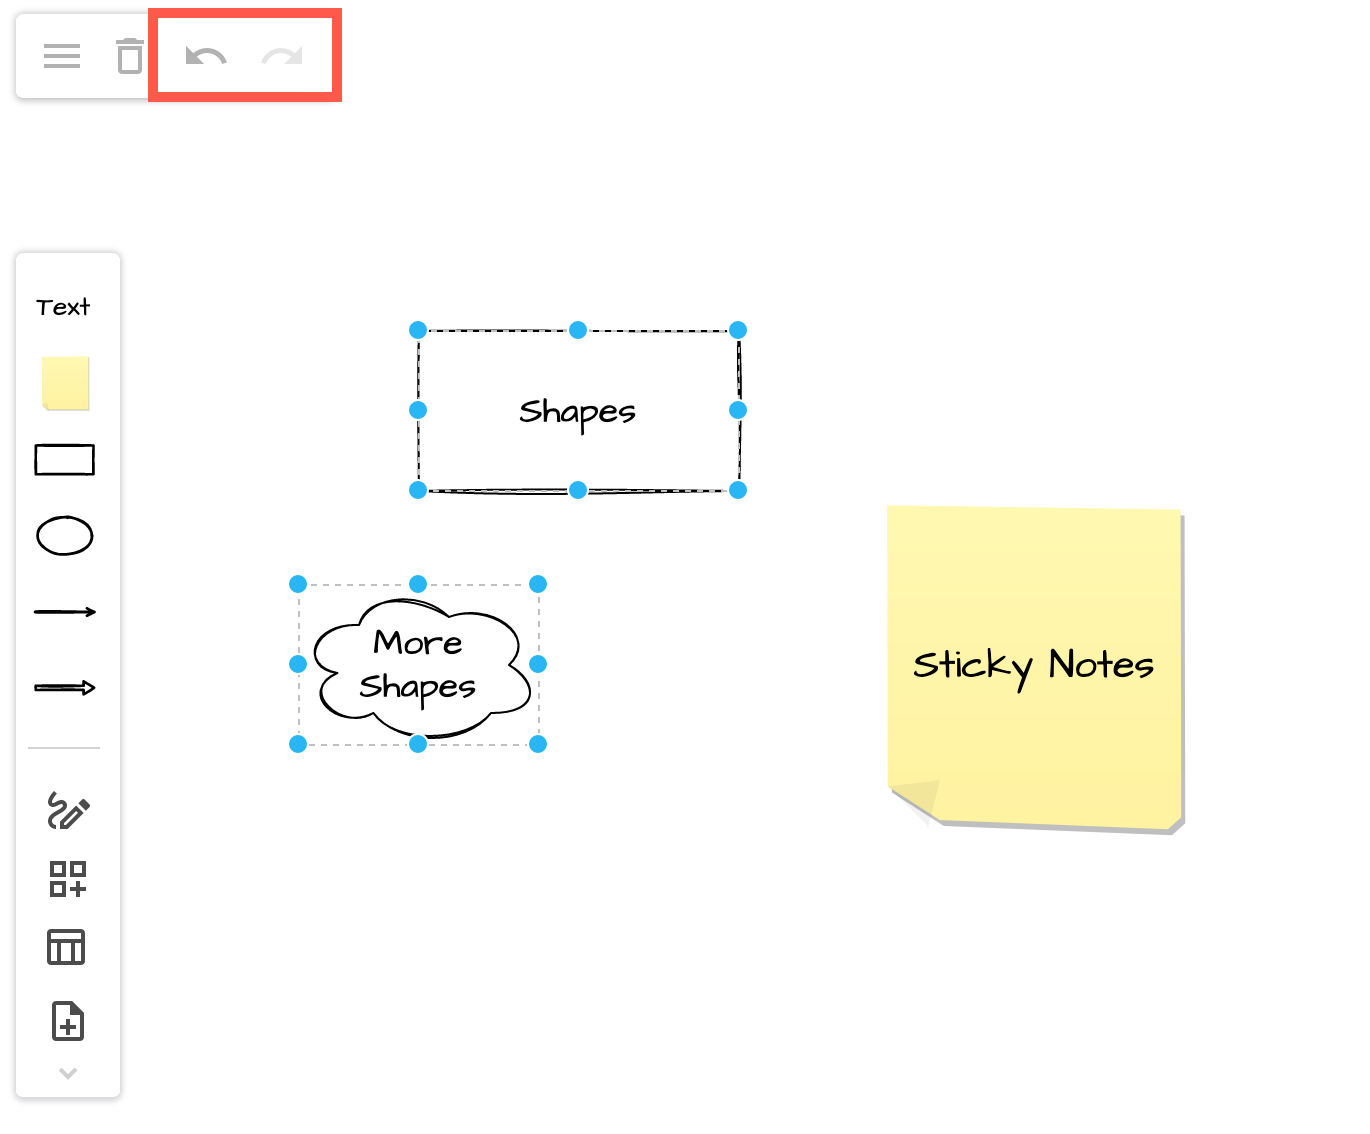
Undo and redo changes: Click on the undo and redo arrows next to the diagrams.net icon in the top left to undo and redo the most recent changes. These tools will not be shown unless you have edited the diagram.
Connect shapes on the whiteboard
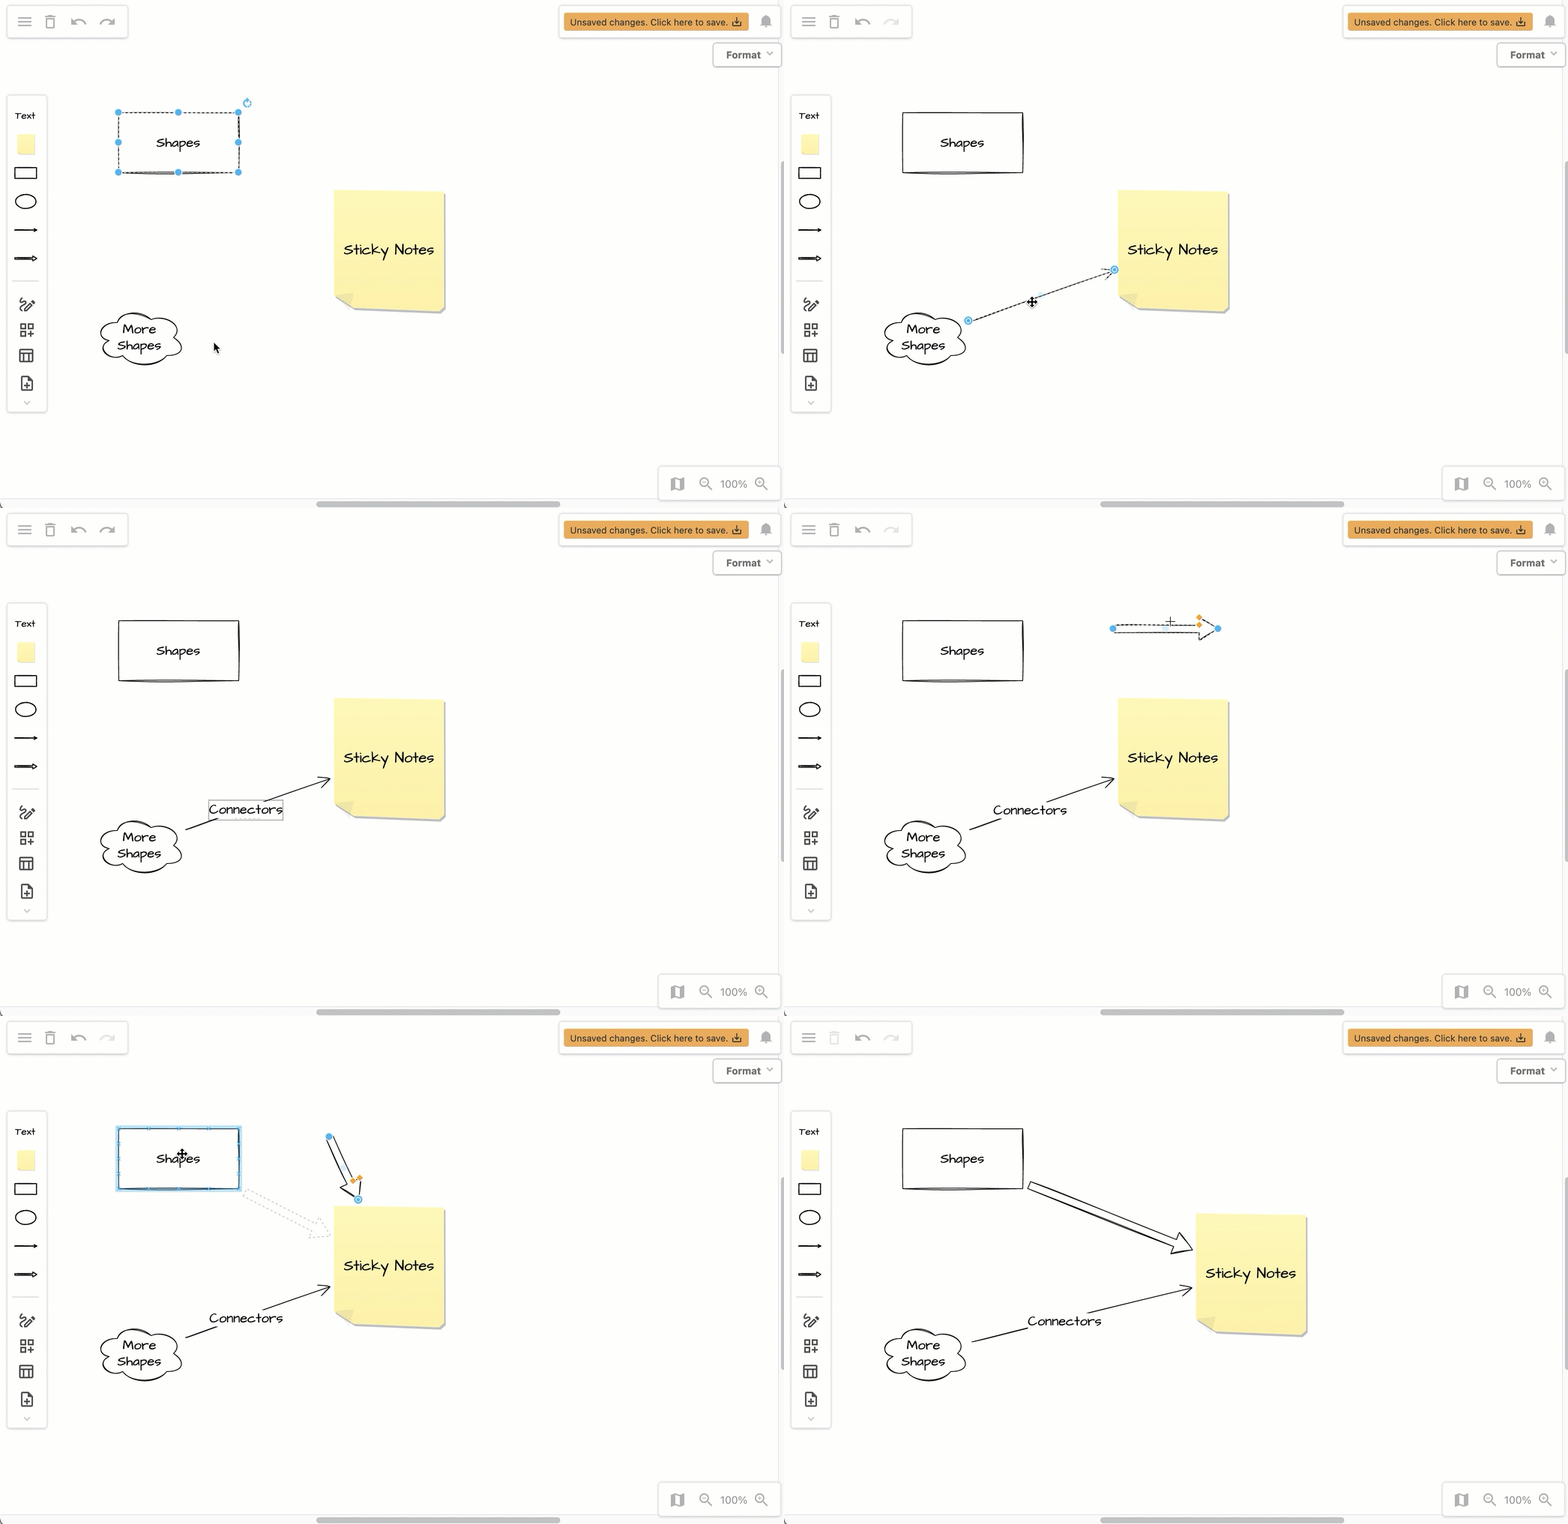
Once you have added a shape to the whiteboard canvas, hover over it with your mouse to see four direction arrows. You can add labels to connectors just like shapes.
Add and connect a new shape: Click on the direction arrow and select a shape to add and connect it in that direction.
Connect two existing shapes: Click and drag a new connector from one of the direction arrows that appear when you hover over the source shape and drop it on another shape to connect them.
Add a connector from the toolbar: Click on the Line or Arrow tools in the toolbar to add one to the whiteboard canvas. Drag an end and drop it on an existing shape to attach that end of the connector to it.
Resize, move and rotate shapes
Online whiteboards are more flexible than their physical components. Select a single shape or sticky note first.
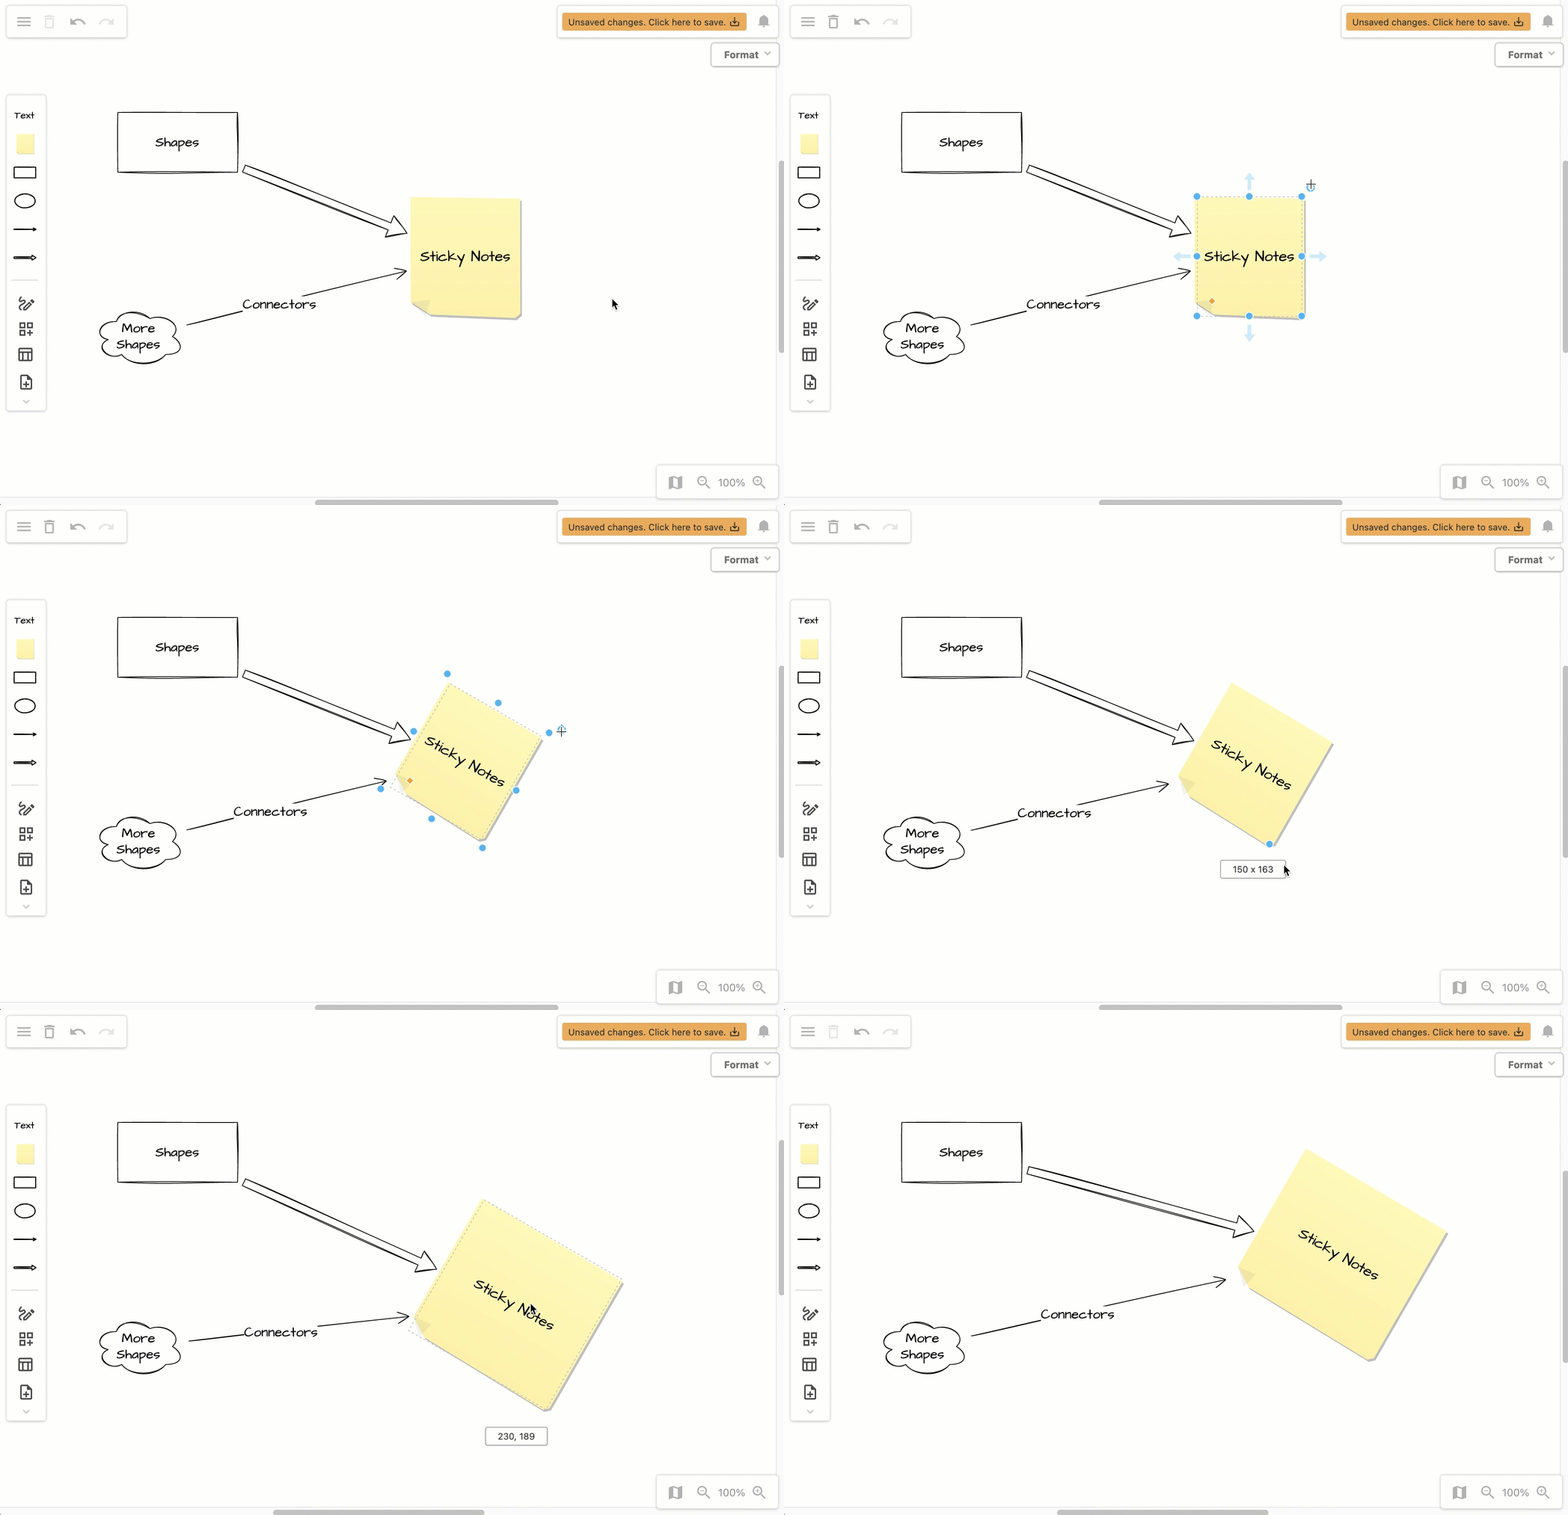
Resize shapes: Drag one of the blue dots to resize, just as you would an image in a document.
Rotate shapes: Click or drag the rotate arrow that is at the top-right of a selected shape to rotate it around a central point.
Move shapes: Drag shapes to a new position on the whiteboard canvas.
Move around the online whiteboard
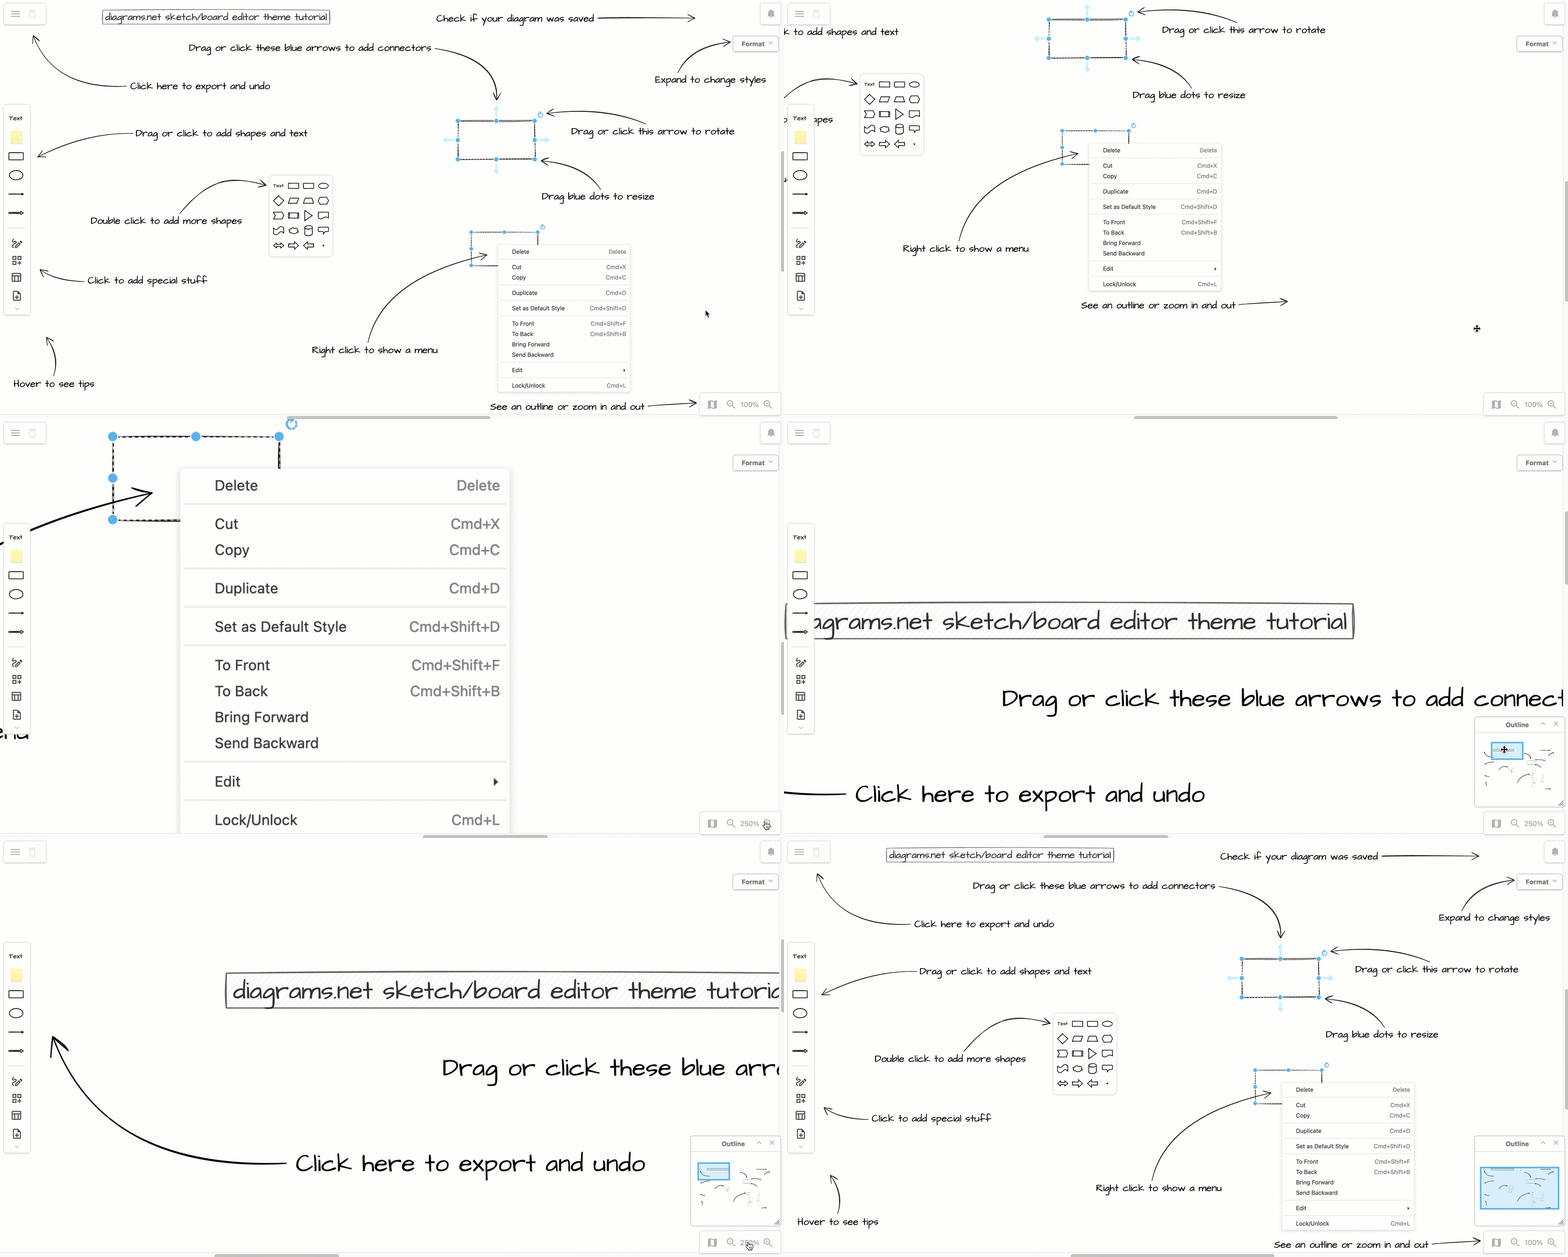
Move around the whiteboard canvas: Click and hold the right or middle mouse button and drag the canvas to a new position.
Zoom in and out: Use the scroll wheel on your mouse, or click on the magnifying glass tools in the bottom right. Click on the number in the center to reset the zoom to 100%, or again to fit the whiteboard content to your browser window.
See an outline of the entire online whiteboard: Click on the Outline tool in the bottom right to open a floating panel. The area highlighted in blue is your current browser window. Drag the blue area to move quickly to another section of the whiteboard.
Style shapes, text and connectors
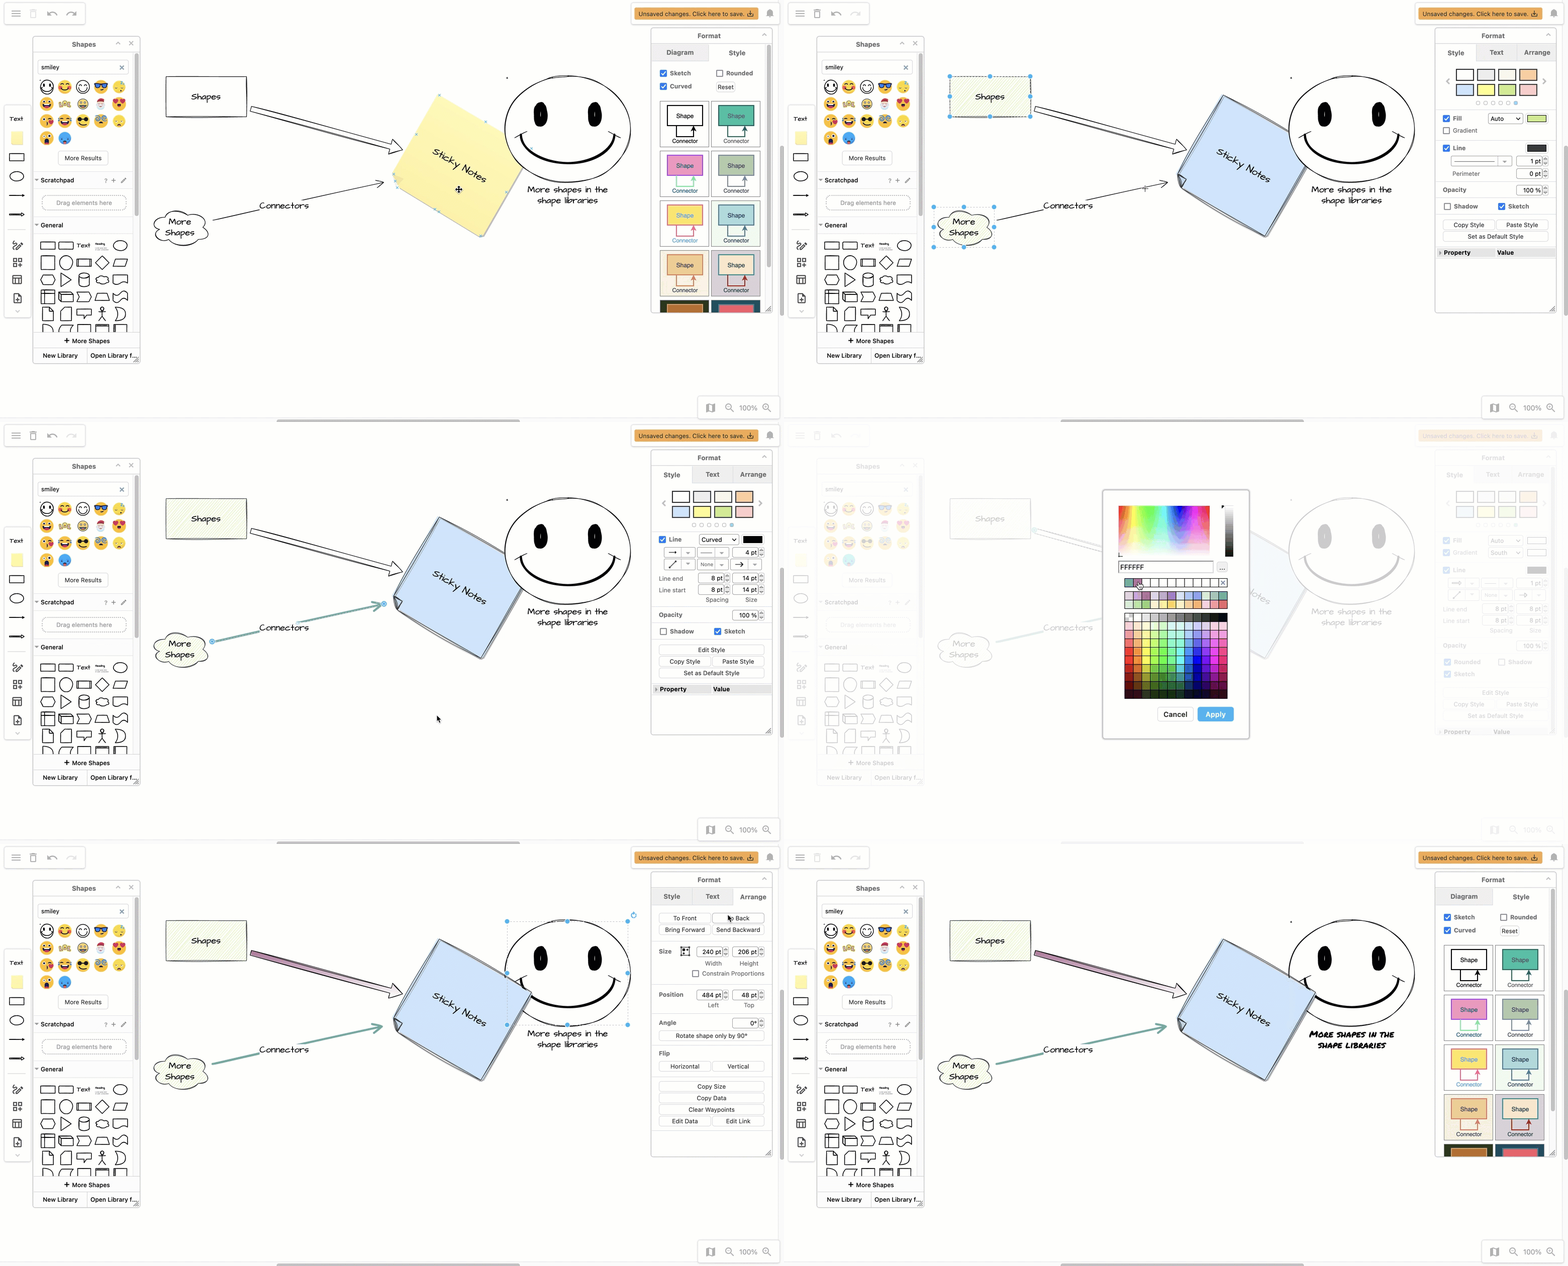
Change the outline and fill colours, label fonts and colours, as well as connector styles and arrow ends. Colours and styles are used to indicate types, groupings, priorities or responsibilities, and make it easier to understand diagrams quickly.
Click on the minimised Format panel’s title to expand the format panel.
- Style tab: Use the shape and connector colour palettes, connector and outline style options.
- Text tab: Format text size, fonts and colours.
- Arrange tab: Set exact values for shape rotation and where the shape is in the front-to-back stack of overlapping shapes.
The tools and options available in the format panel will depend on what you have selected in your diagram.
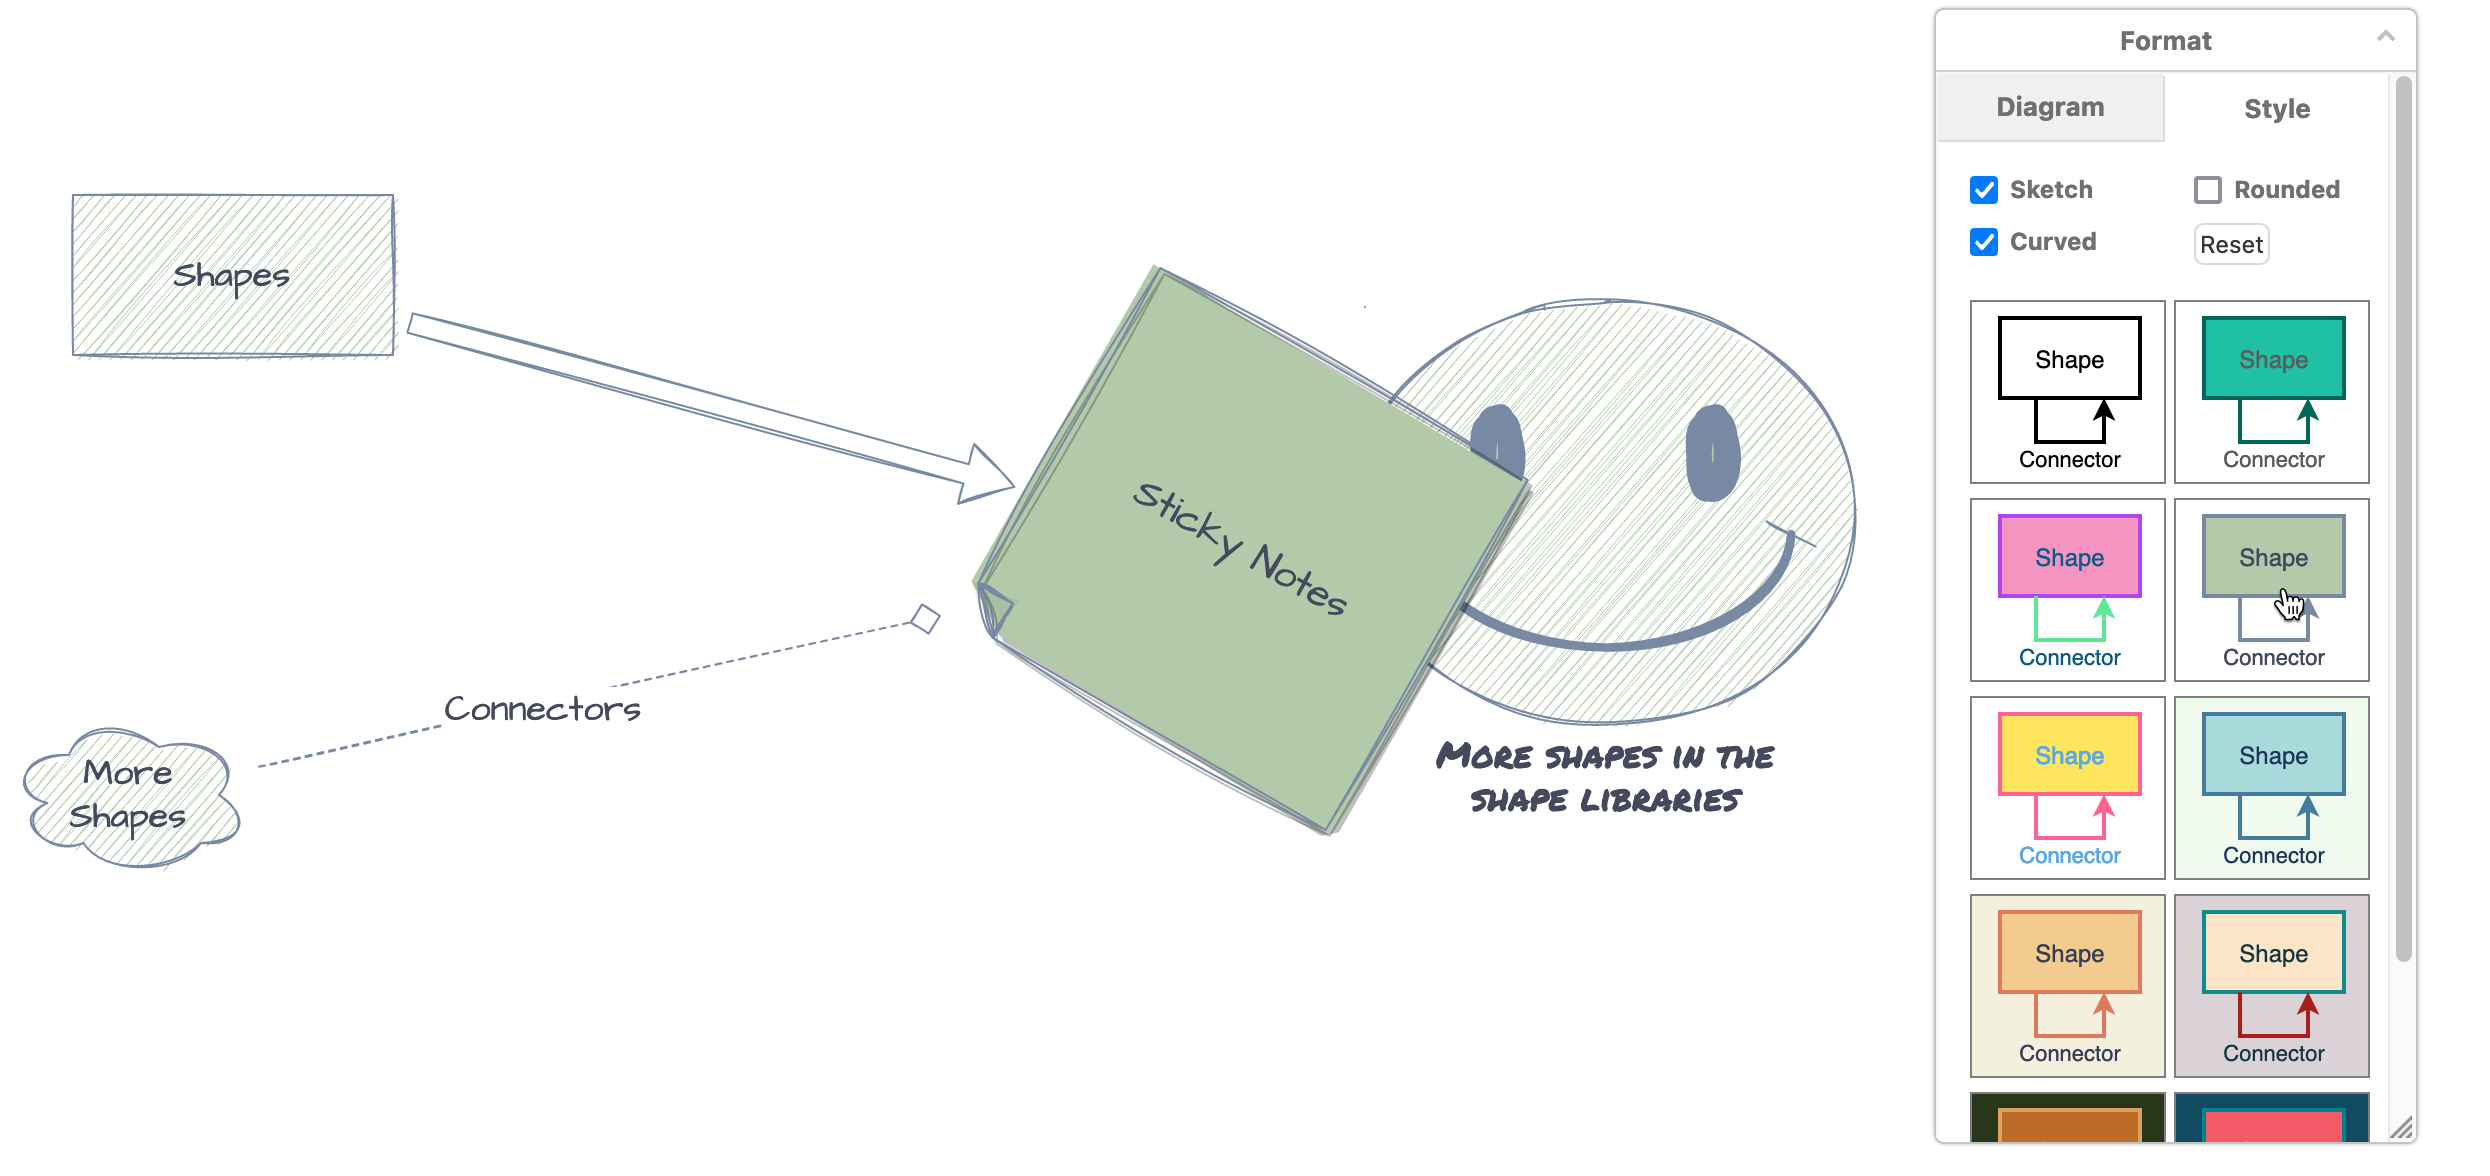
With nothing selected, you can change the colours of all shapes and connectors with a global style.
- Click on the Style tab in the format panel.
- Hover over one of the styles to see a preview, and click on it to apply it to your diagram.
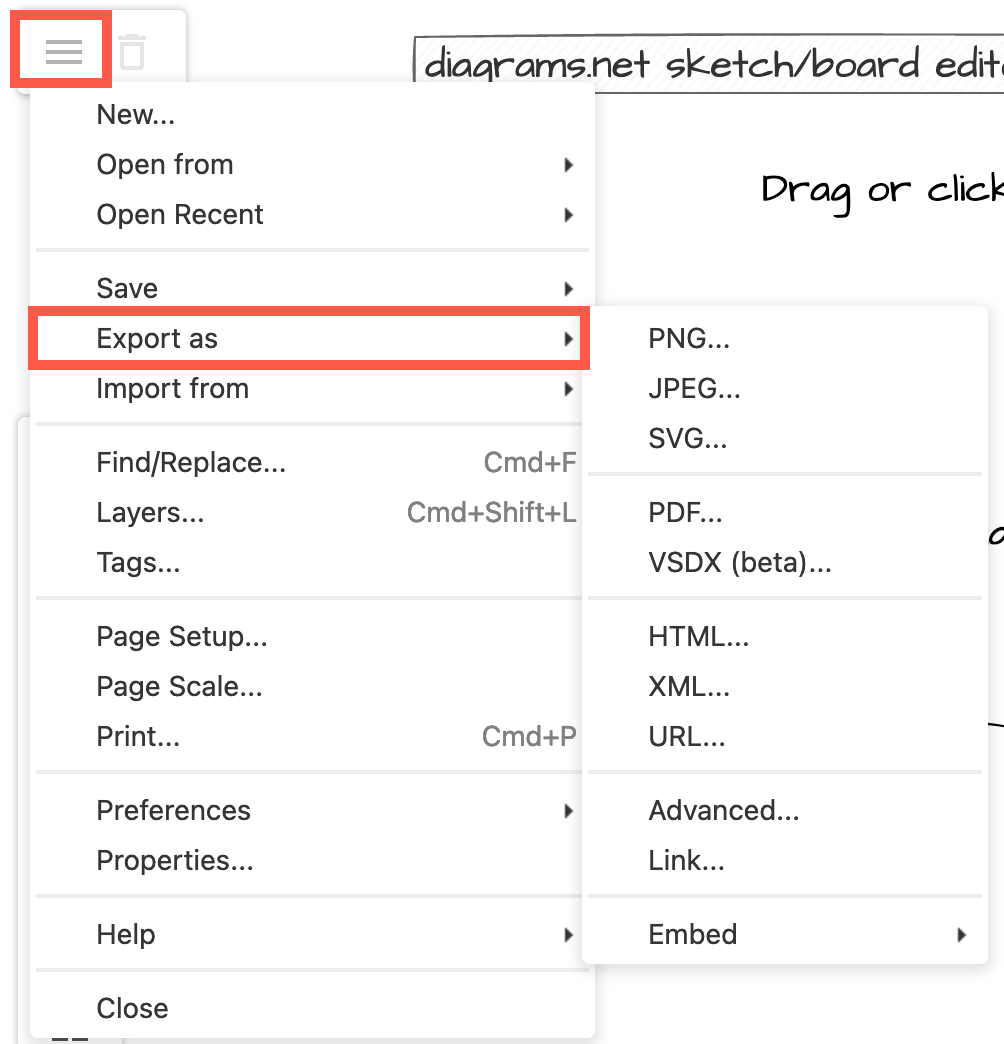
Export your whiteboard diagram
Click on the draw.io logo in the top left to open the simplified menu. You can export your whiteboard diagram to various formats, and access additional tools from this menu.
Do more with shapes
There are many shapes available in diagrams.net that aren’t in the toolbar on the left.
See more shapes: Click on the Shape tool in the toolbar to open the floating shapes panel.
Search for shapes: At the top of the Shape panel, type the name of a shape in the search field and press Enter.
Open a different shape library: click More Shapes, select the shape library you wish to use, and click Apply.
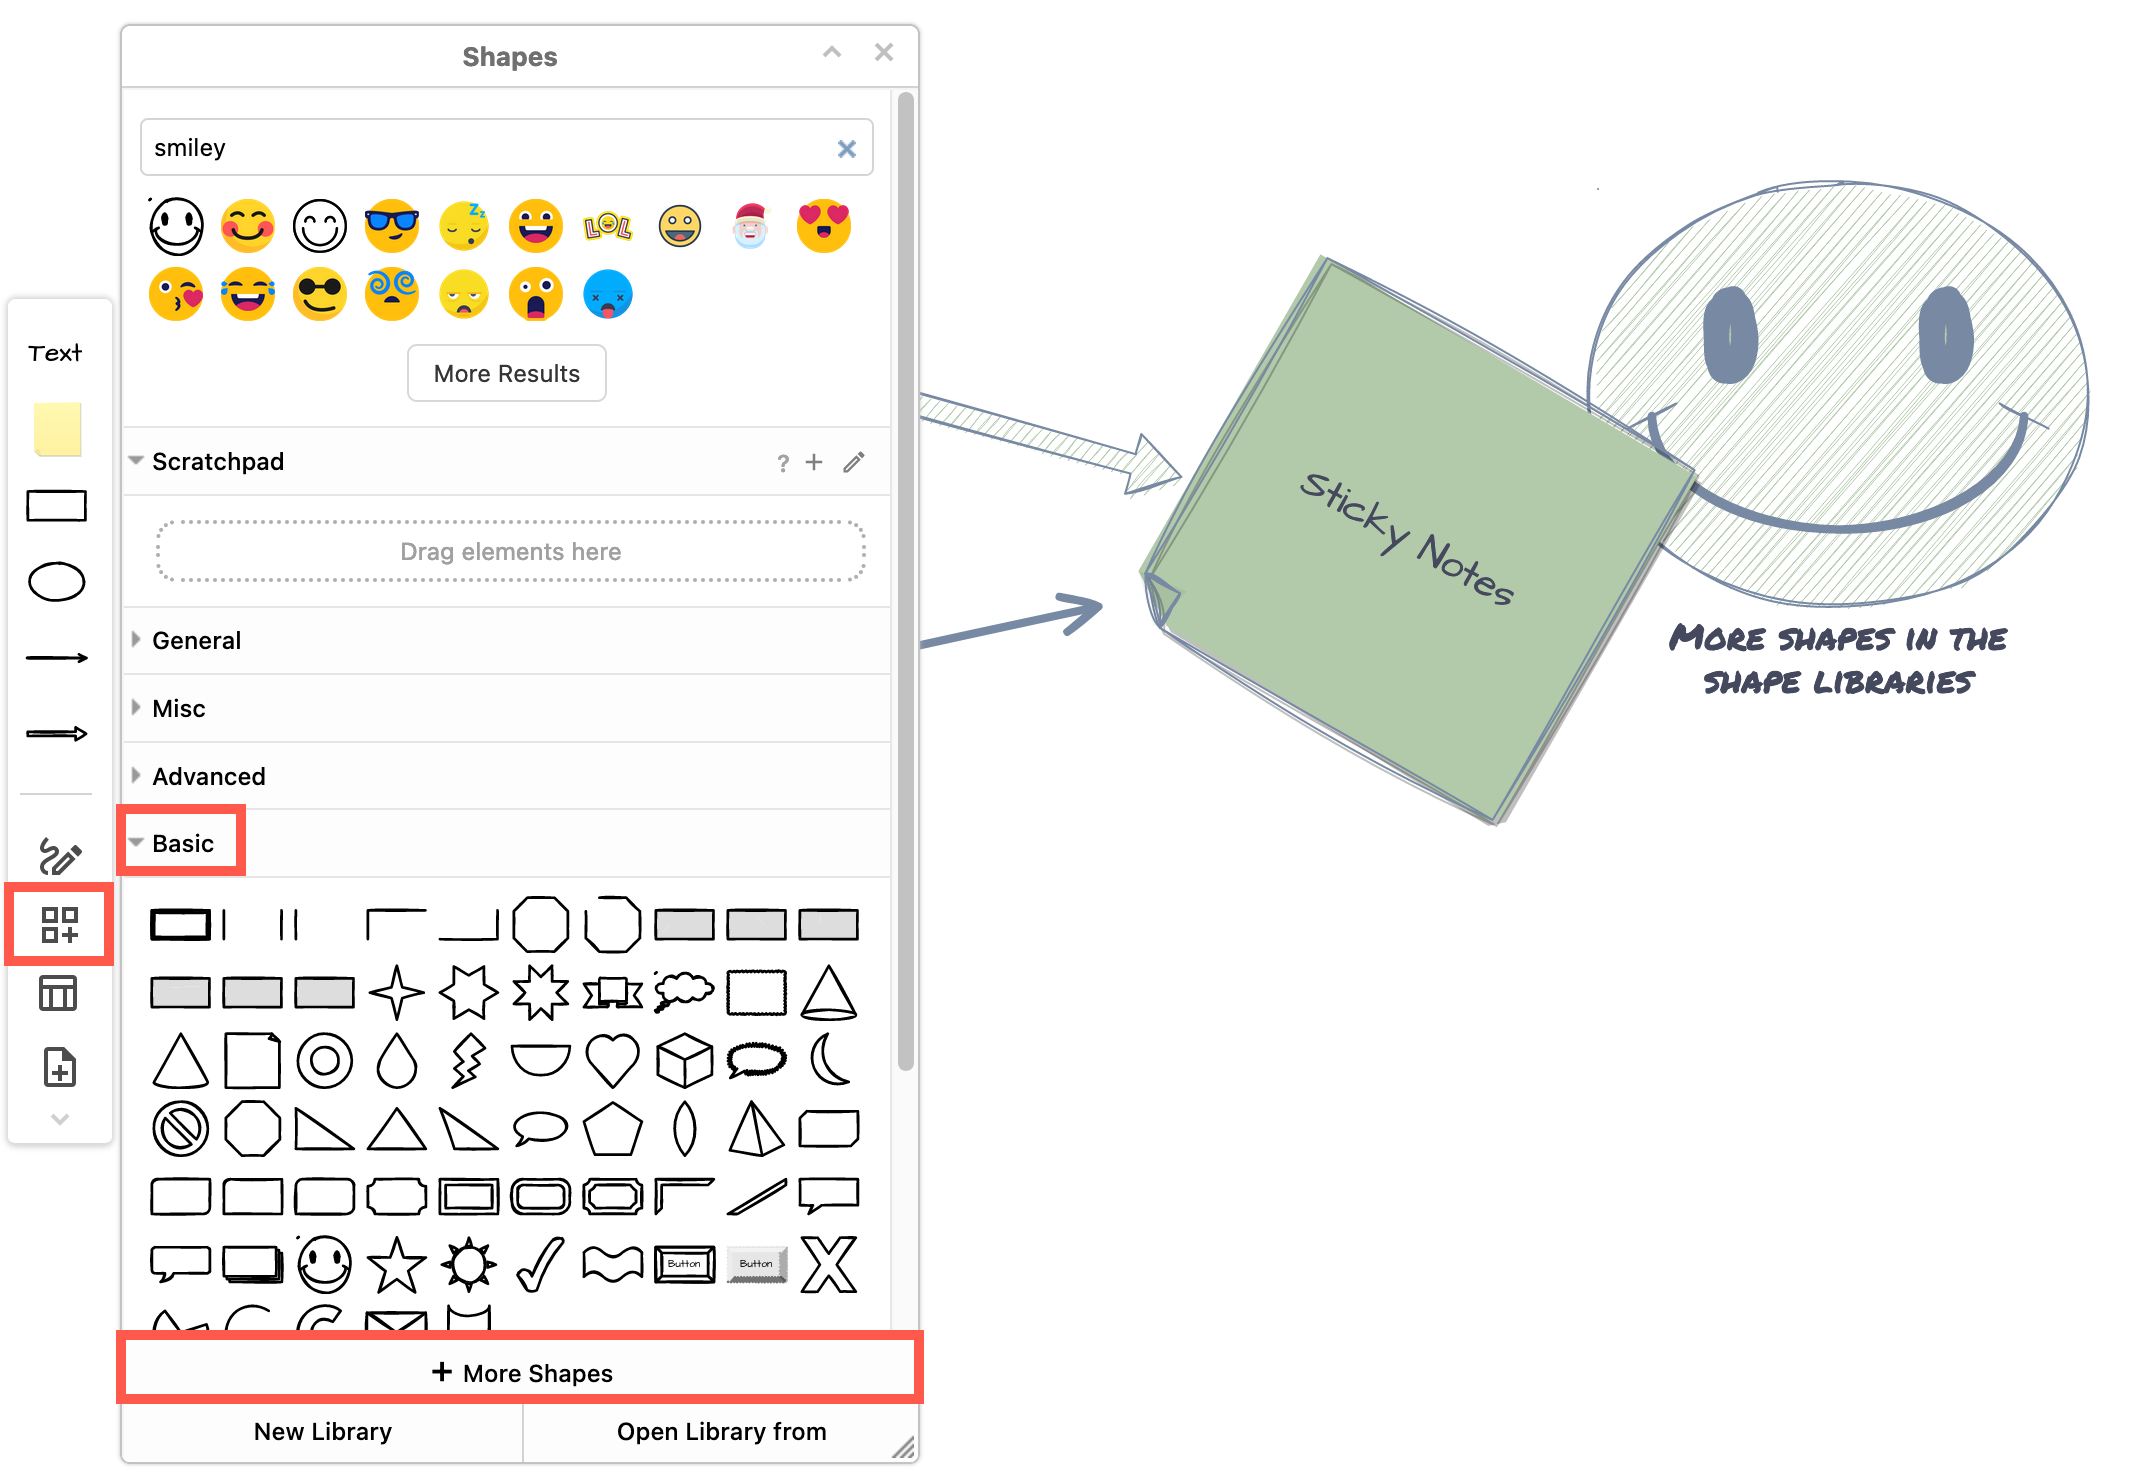
There are many shape libraries for specific types of diagrams, as well as broad categories: software and networking categories with many shape libraries for different types of IT diagrams and service platforms, flowcharts, floorplans, electrical, threat modelling, cabinets for rack diagrams, and many more.
Draw a freehand shape: Click on the Freehand tool to draw a freehand shape with your mouse, finger or touchscreen pen, which will be saved as an image with a transparent background.
Learn more about drawing and styling freehand shapes
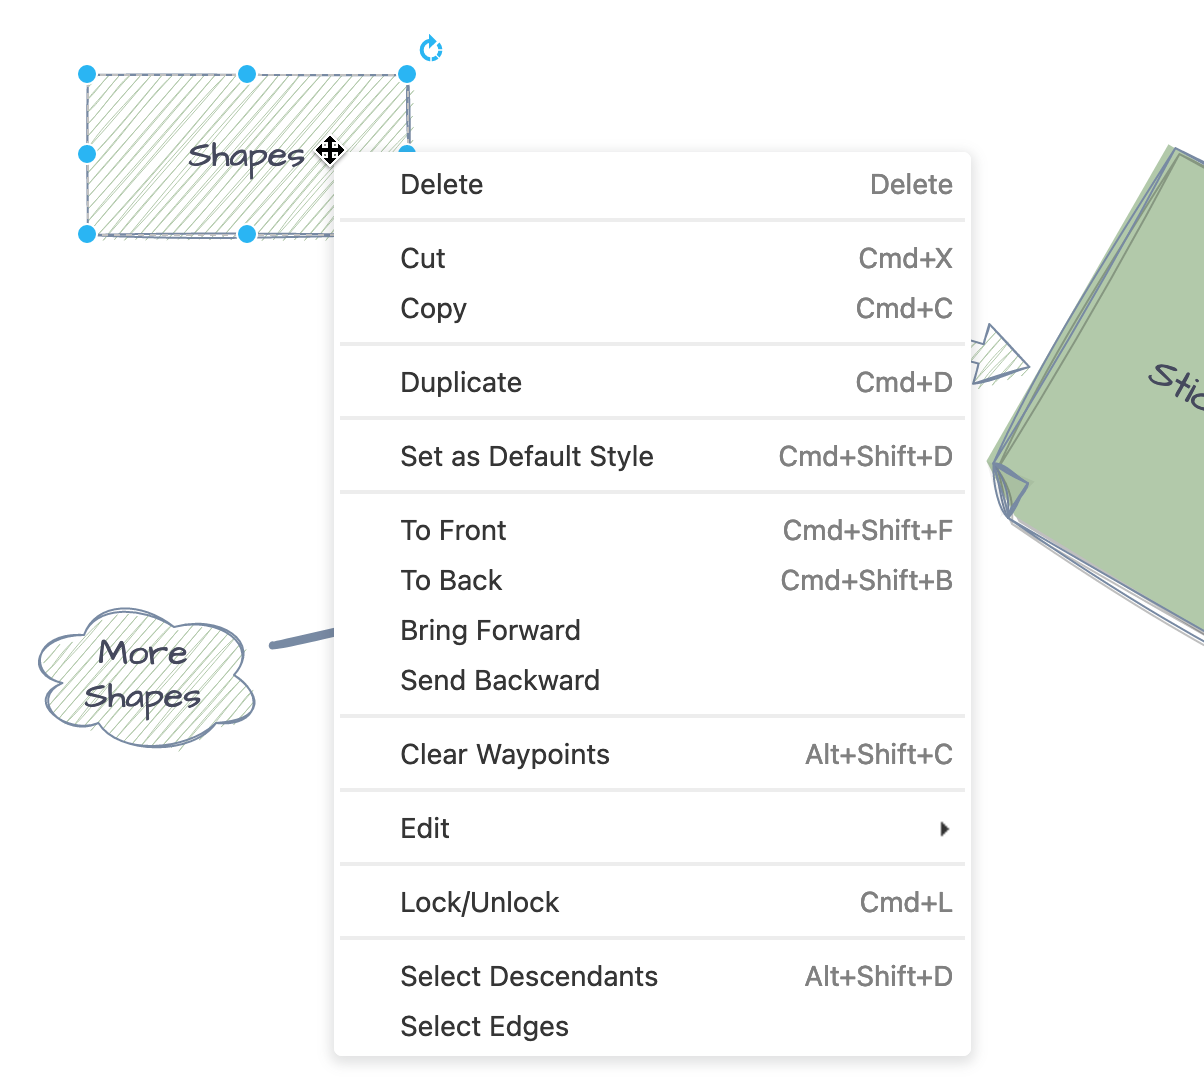
Manipulate shapes with a context menu: Right-click on a shape to see the context menu. Move shapes forward and backwards, duplicate them, set a style as a new default, add links to shape and see the shape metadata and style information.
Use a template diagram on the whiteboard
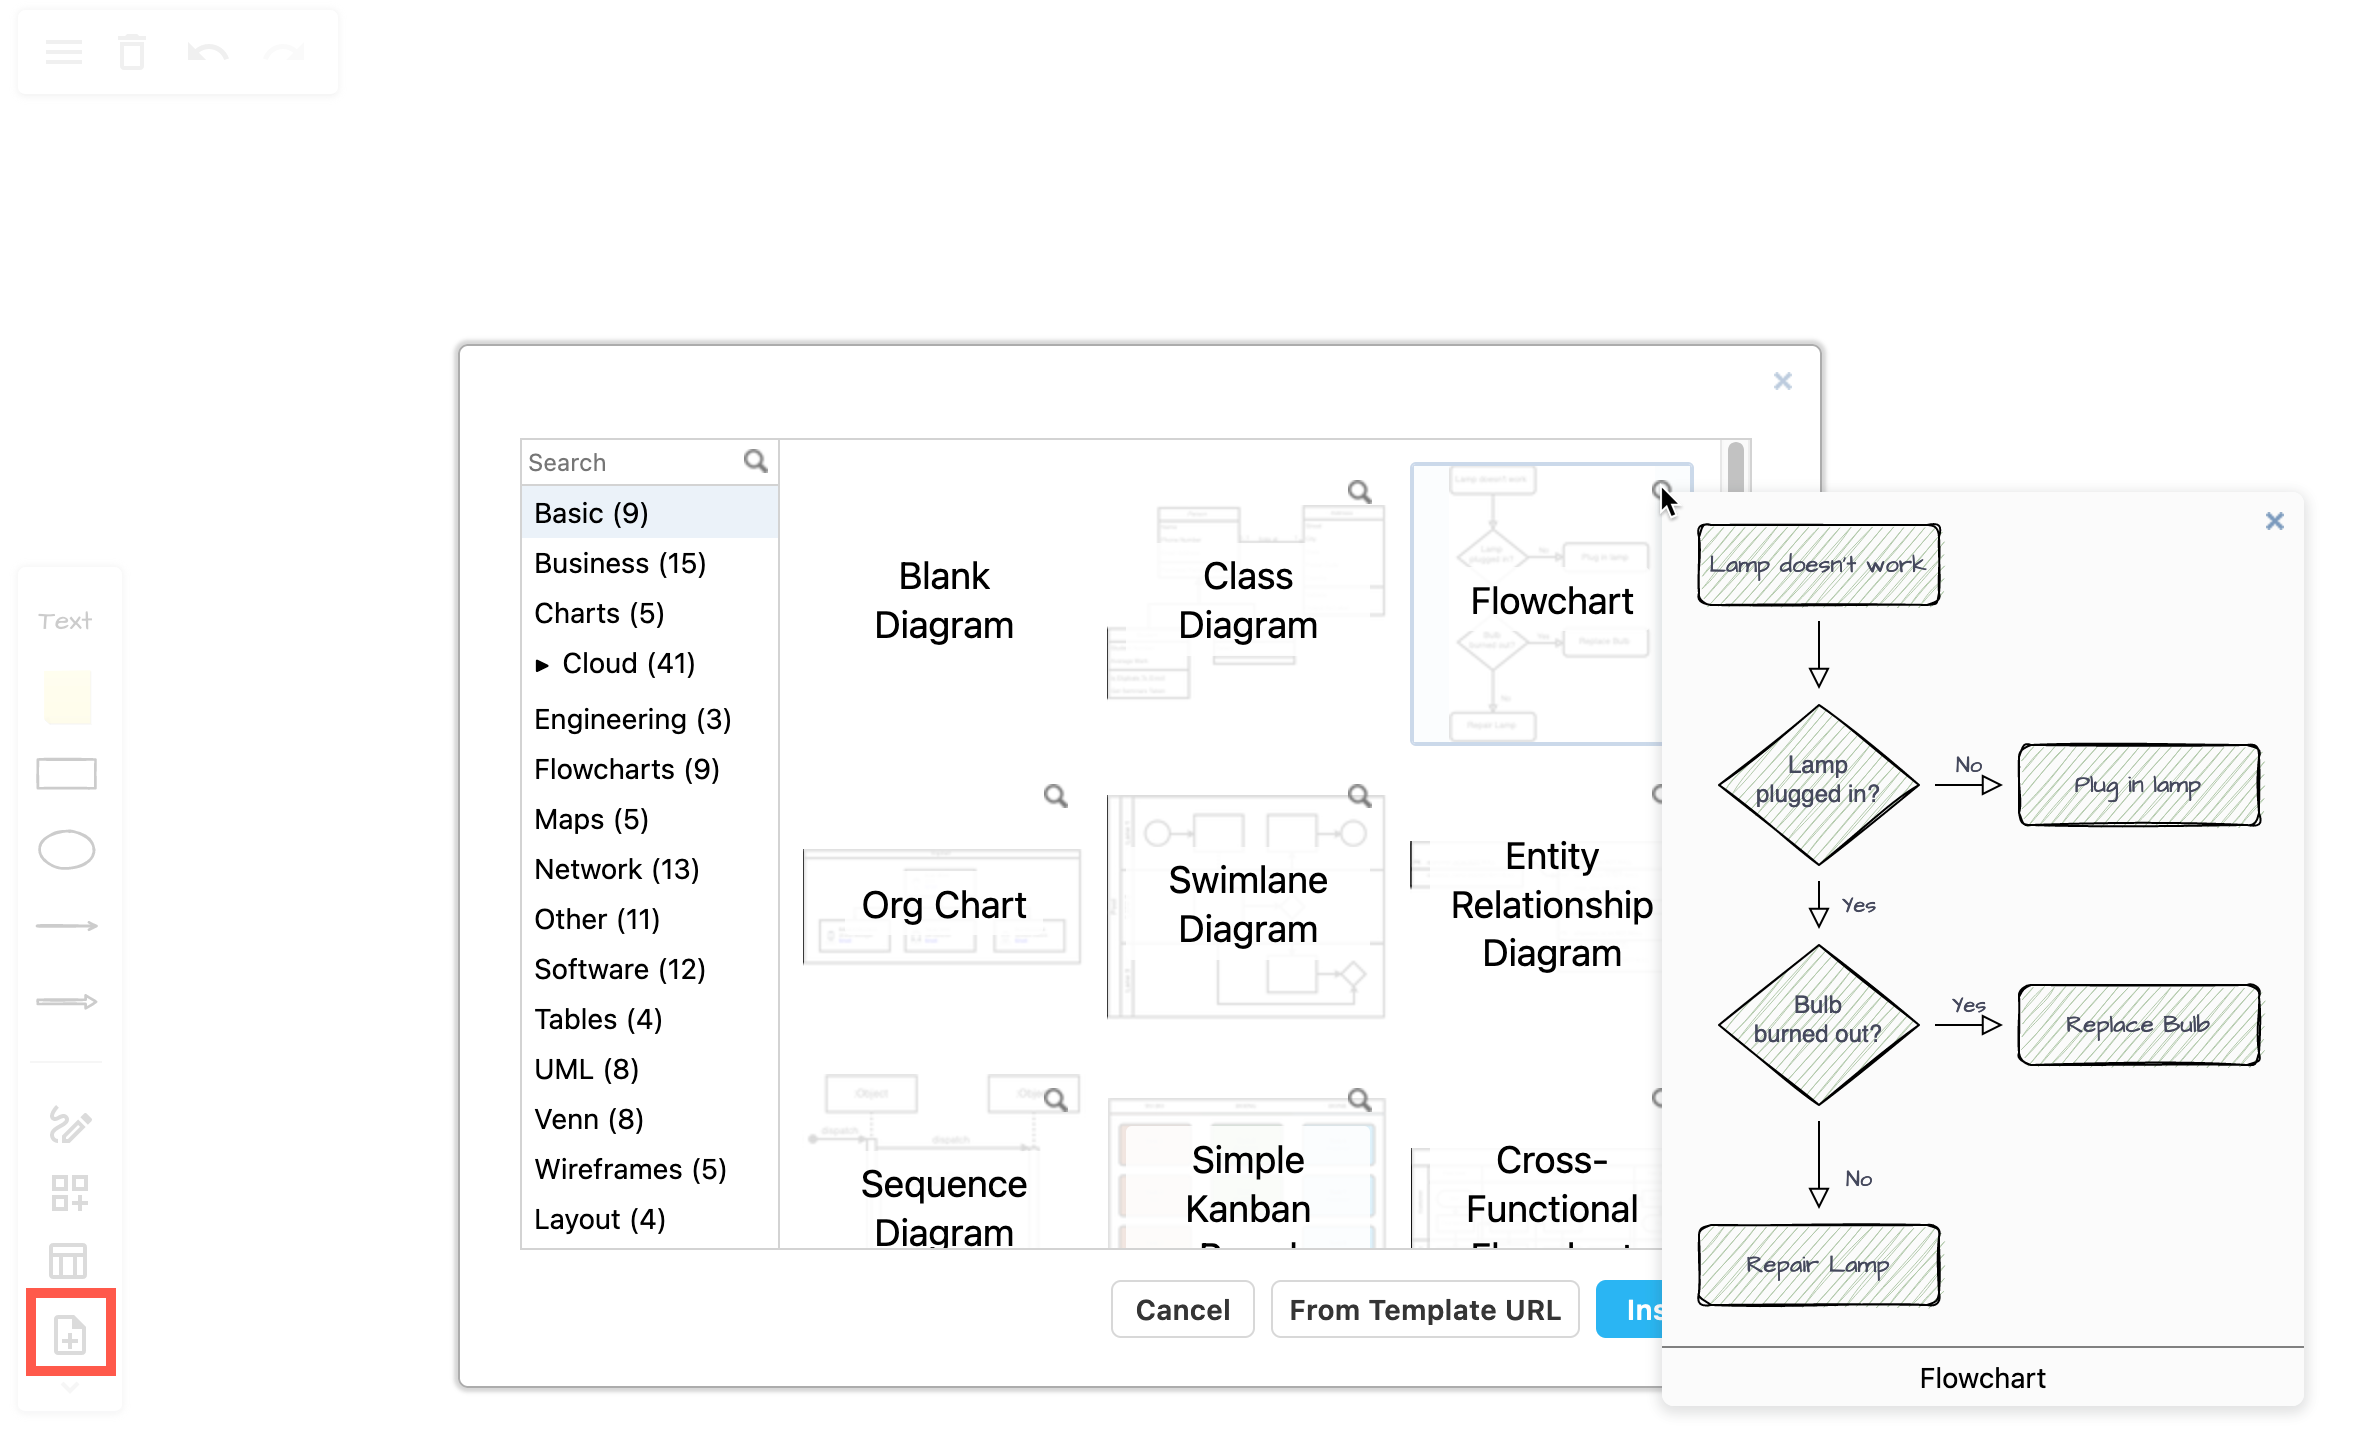
If you don’t want to start with a blank diagram, you can choose one of the many diagrams.net templates: Kanban boards, mindmaps, mockups, flowcharts, BPMN diagrams, infrastructure diagrams, floorplans and many more.
- Click on the template tool in the toolbar on the left to open the template library.
- Select the template category on the left. Click on the magnifying glass in the top right of a template thumbnail on the right to see a larger preview.
- Select the template you want to use, then click Insert.
